FAQ Details
How do I register online?
All online registration activity will take place in SUNY Cortland's web portal, myRedDragon. Navigate to the portal and follow the steps below.
STEP 1: Enter your username and password on the login page. If you do not have a password, or you are unable to access the portal, contact the The Help Center at x2500 or via THC@cortland.edu.

STEP 2: After you sign in, Select the "Student" tab and navigate to the Registrar Channel (on the left side of the screen).

STEP 3: Select "Check Registration Status." Choose the semester/term and select "Submit Term." Your registration time-ticket information will display. You will also see any special permissions you have been granted.

Time Ticket: The dates and times listed represent your "time ticket." You will not be able to register before the day and time indicated.
Class for Registration Purposes: This represents the class you are assumed to be for the registration term. This may not match your current class. Banner reviews in-progress coursework, and your completed coursework, and calculates a future-looking status. This is so you are able to enroll in classes that match the class level you will be in, once your in-progress courses are completed.
If you are able to register, go directly to the next step. If you are unable to register because of a hold, you must clear the hold before you can register. If your academic status or standing prohibits registration contact your respective Dean's Office.
STEP 4: Select "Schedule Builder" to create your optimal schedule. If you are a visiting student skip to Direct Registration steps below.
STEP 5: Select the appropriate term.

STEP 6: Select the appropriate campus.

STEP 7: Add your desired courses and any breaks that need to be part of your schedule.
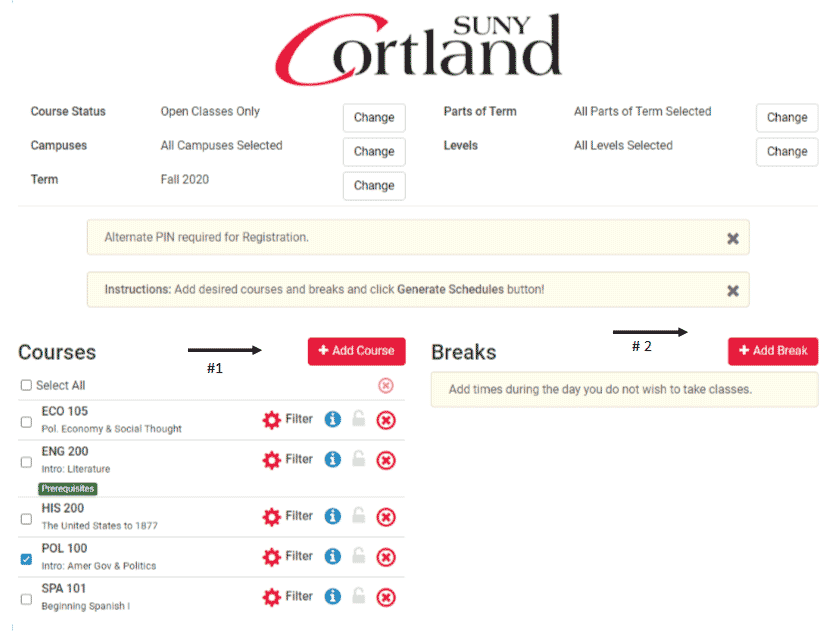
STEP 8: Generate schedules
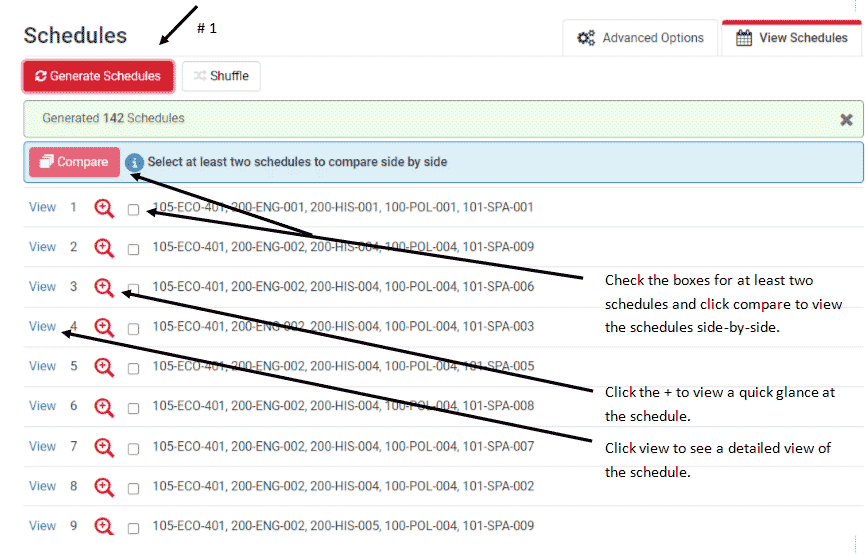
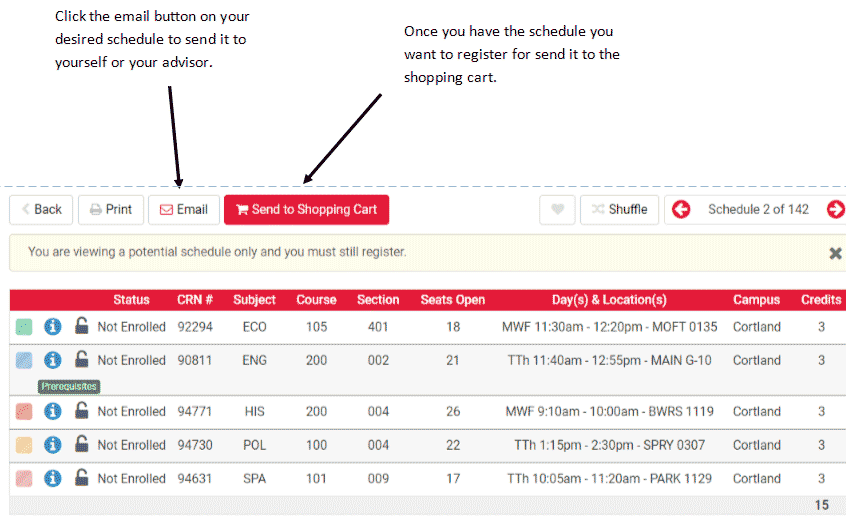
STEP 9: Select optimal schedule to place in the shopping cart. Identify other favorites by tagging them with the heart.
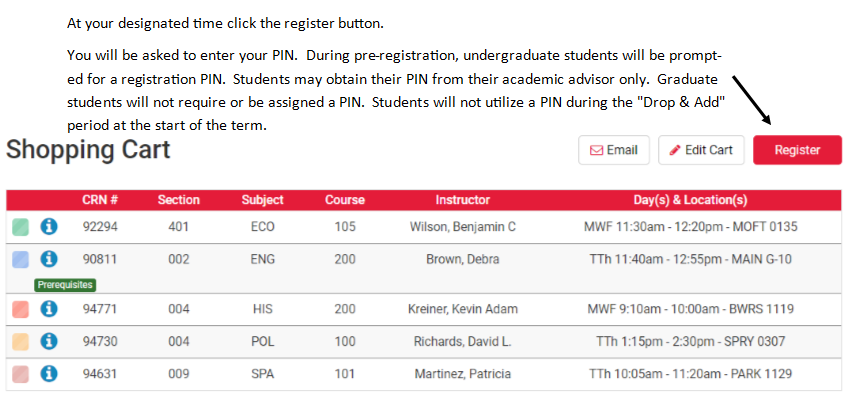
STEP 10: Register
STEP 11: Check for any errors.
STEP 12: Drop/Add


Direct Registration
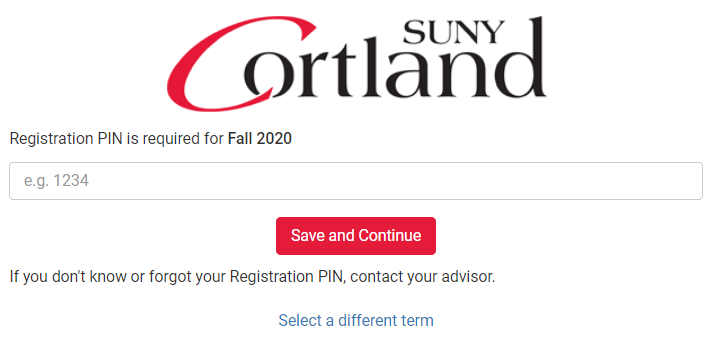
STEP 1: Select "Register or Drop & Add Courses" to begin registration if you are a visiting student or do not need to build a full schedule. During pre-registration, undergraduate students will be prompted for a registration PIN. Students may obtain their PIN from their academic advisor only. Graduate students will not require or be assigned a PIN. Students will not utilize a PIN during the "Drop & Add" period at the start of the term.
STEP 2: Enter the CRN for each of your course selections in the "Add Classes Worksheet" area on the registration worksheet.

The CRN may be found on the searchable public schedule of classes. You may use any combination of attributes to search for courses using the public schedule (course prefix, course number, department etc...).

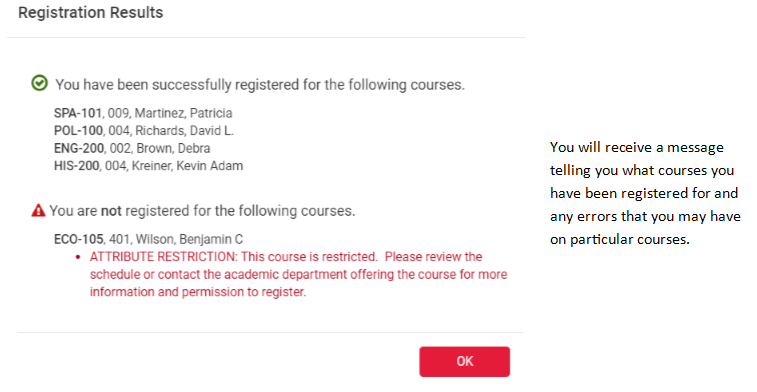
STEP 3: Select "Submit Changes" after you have entered the CRN. Courses you have successfully registered for, and any errors that prevent a successful registration, will be displayed under the "Current Schedule" heading. Try to resolve your registration errors if possible. You may need to contact an academic department to seek permission to enter a course. (Review the error message document for error message assistance.)

Additional Search Tools
In addition to directly entering the CRN, you may also search for courses within myRedDragon by selecting "Class Search" at the bottom of the registration worksheet. 
You may use any combination of attributes and search fields to search for courses via the search screen (see below).

The search results page will let you select the course you would like to add to your schedule. If the course is open for registration, a checkbox will be available (see below). If the course is closed or unavailable you will see a "C" (closed) note, as opposed to a checkbox.

When you are complete, you may click "Register" to attempt course registration.

Courses you have successfully registered for, and any errors that prevent a successful registration, will be displayed. Carefully check your registration for accuracy.
Printing Your Schedule
Once you complete your registration, return to the Registration Menu, and select "Student Schedule" or "Student Schedule Grid" to view and print your schedule if desired.
Last updated: 8/9/2023