
Monthly Payment Plan

1. Sign in to your (the student’s) myRedDragon account. For assistance with signing in, select one of the help links.
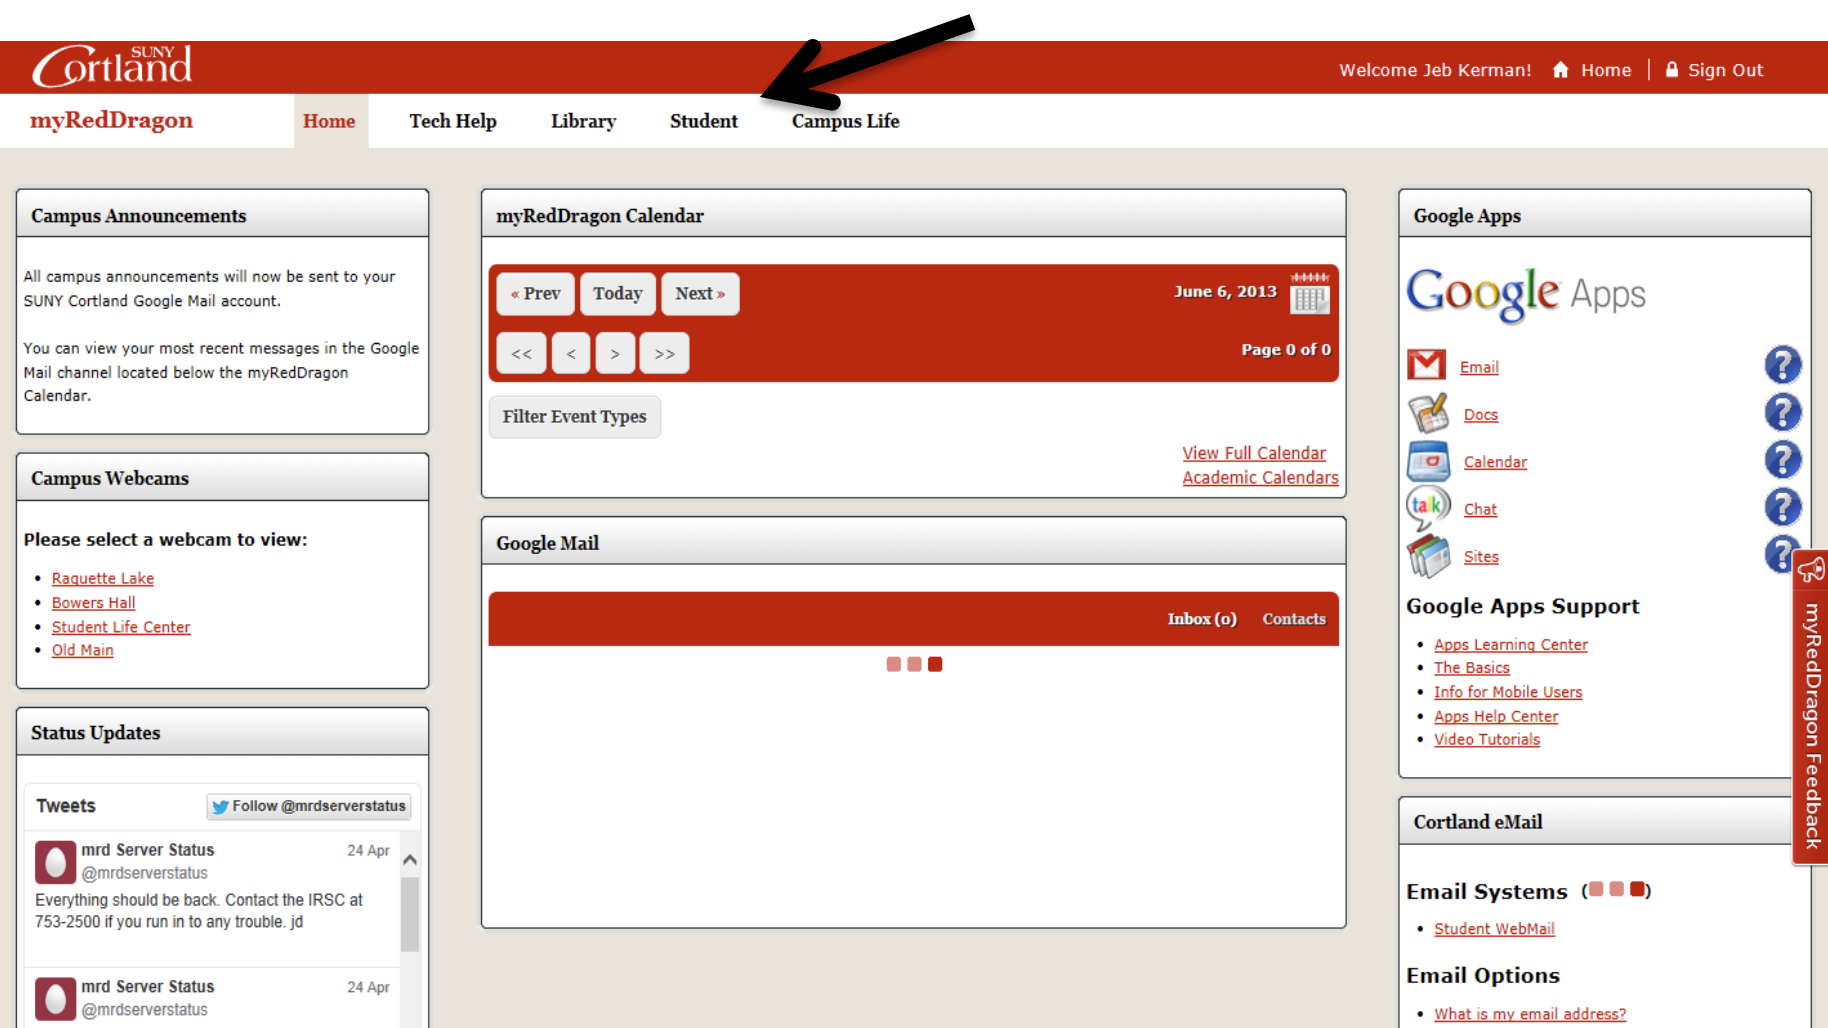
 Screenshot of myRedDragon login

2. Select the Student tab. Your home page may look slightly different.

Screenshot of myRedDragon dashboard with an arrow pointing to the Student tab at the top of the page

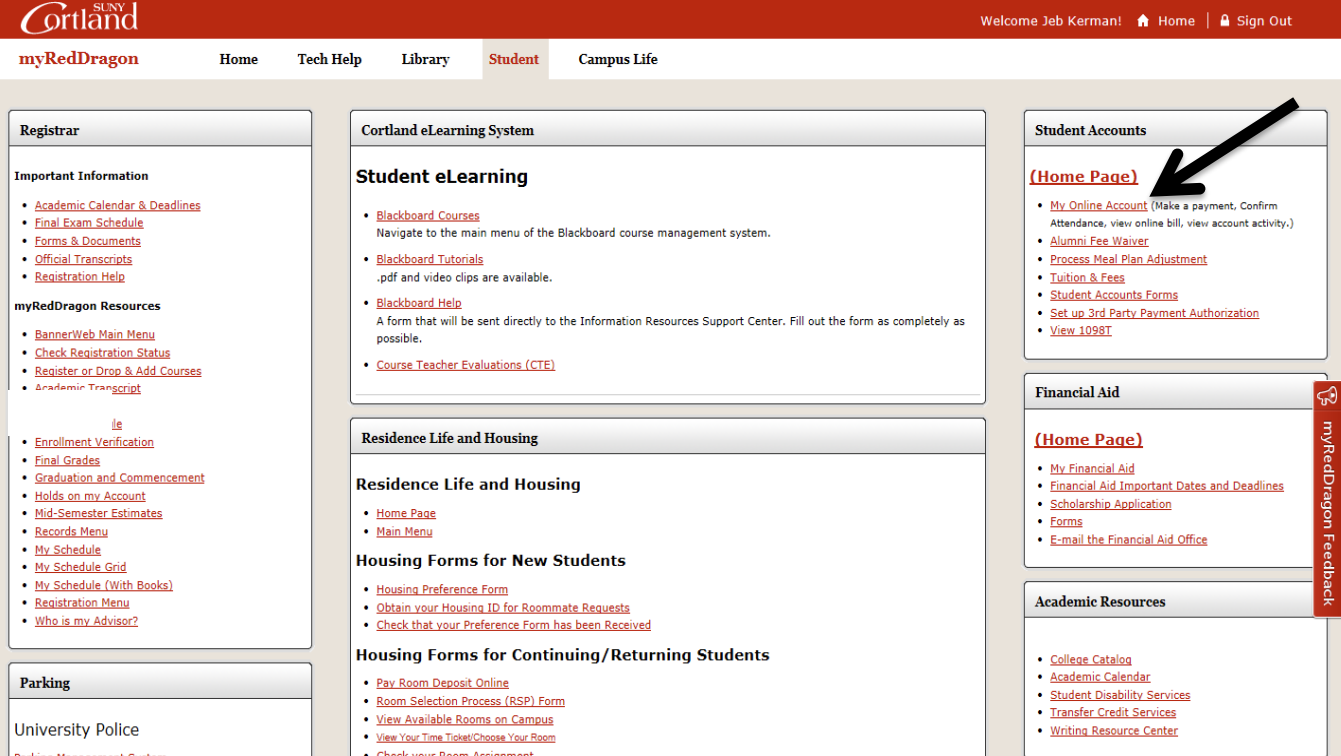
3. Select “My Online Account." Your Student tab may look slightly different. 

Screenshot of the Student Dashboard with an arrow pointing to the "My Online Account" link

4. Select the relevant term from the list(s):

Screenshot with arrow pointing to the "Fall Term" link underneath the "Semesters with Balances" heading. There is a callout that reads "Note the yellow triangle. There is a yellow triangle with an exclamation point inside next to the Fall Term link. Once you have successfully accepted your charges the triangle will no longer appear."

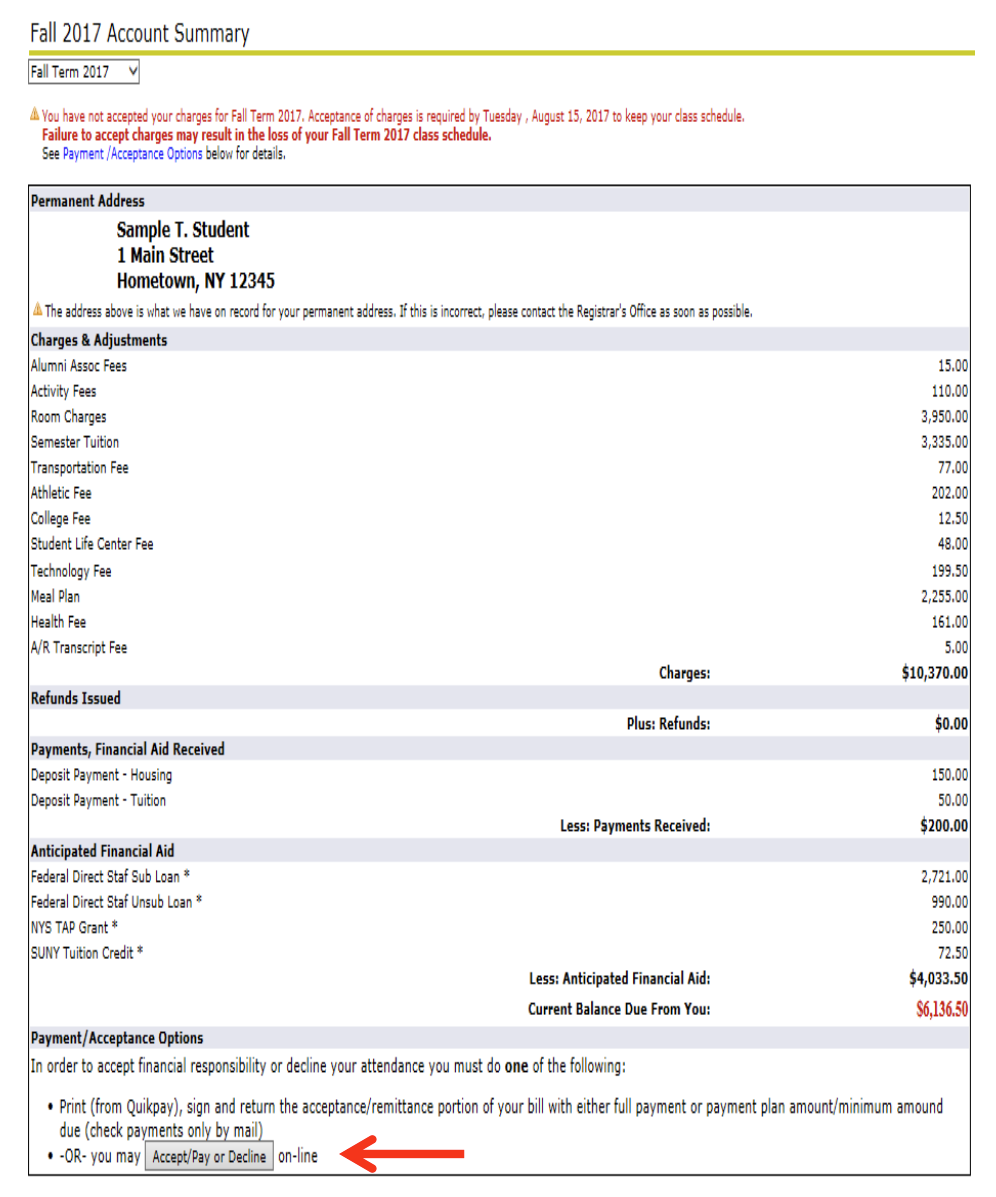
5. Review your account summary and select “Accept/Pay or Decline.” As changes are made to your account throughout the semester they will appear here in real time.

Screenshot of the account summary. An arrow points to the "Accept/Pay or Decline" button at the bottom of the summary.

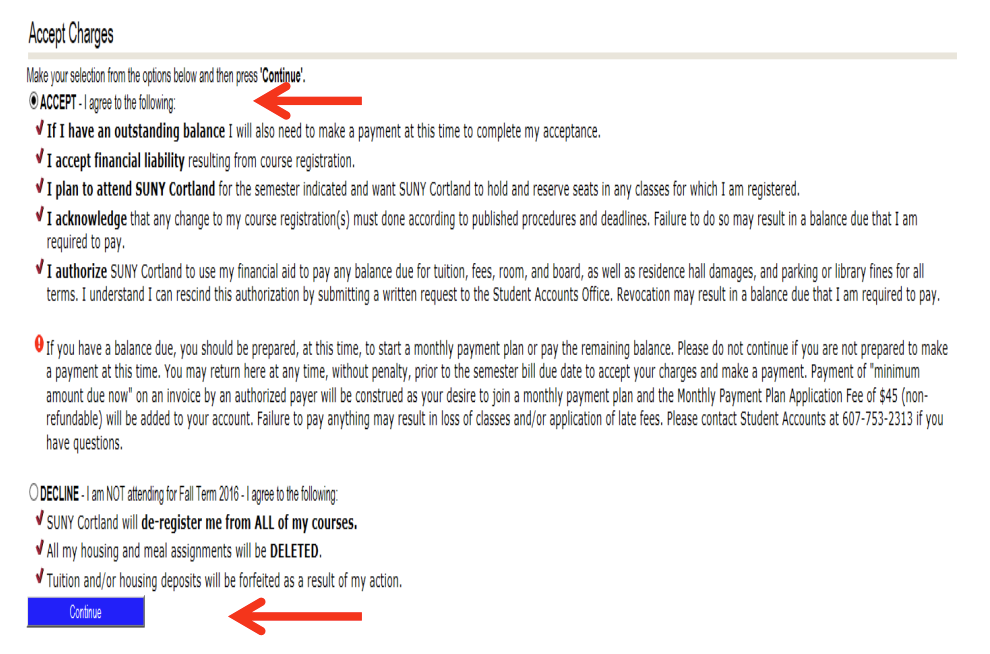
6. Review the verbiage, click “Accept,” then click “Continue:”

Screenshot of the Accept Charges page. There is one arrow pointing to the "Accept - I agree" radio button and a second arrow points to the "Continue" button.

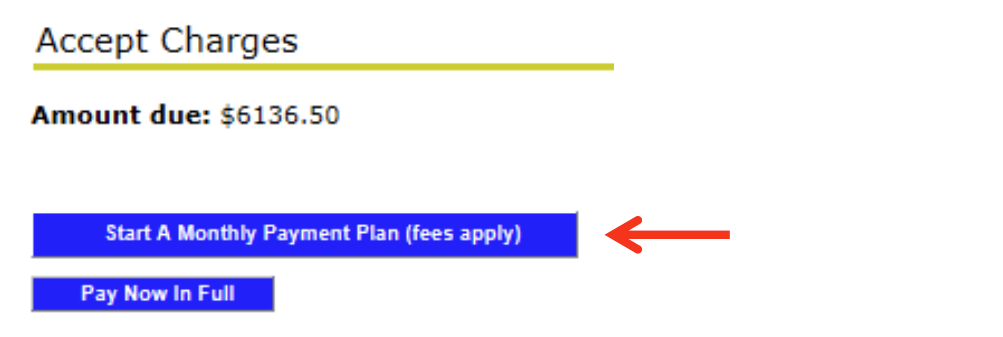
7. Select “Start A Monthly Payment Plan:”

Screenshot of Accept Charges page with an arrow pointing to the "Start a Monthly Payment Plan (fees apply)" button

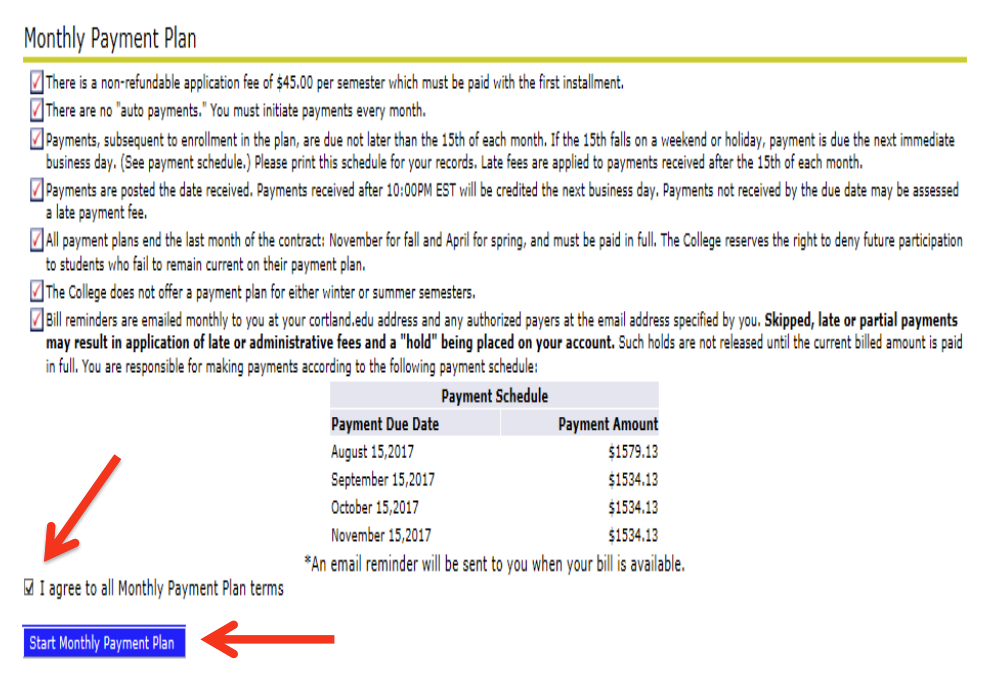
8. Review the terms and conditions of the program, select “I agree to all MPP terms,” and select “Start Monthly Payment Plan.”

Screenshot of the Monthly Payment Plan page. One arrow points to the "I agree to all Monthly Payment Plan terms" checkbox and a second arrow points to the "Start Monthly Payment Plan" button

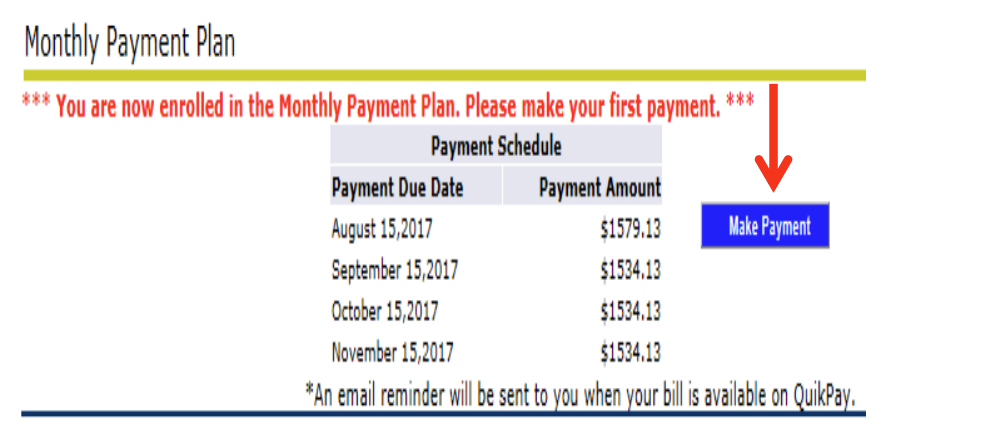
9. Review the payment schedule and print a copy for your records. Select “Make Payment.”

Screenshot of Monthly Payment Plan page with an arrow pointing to "Make Payment" button

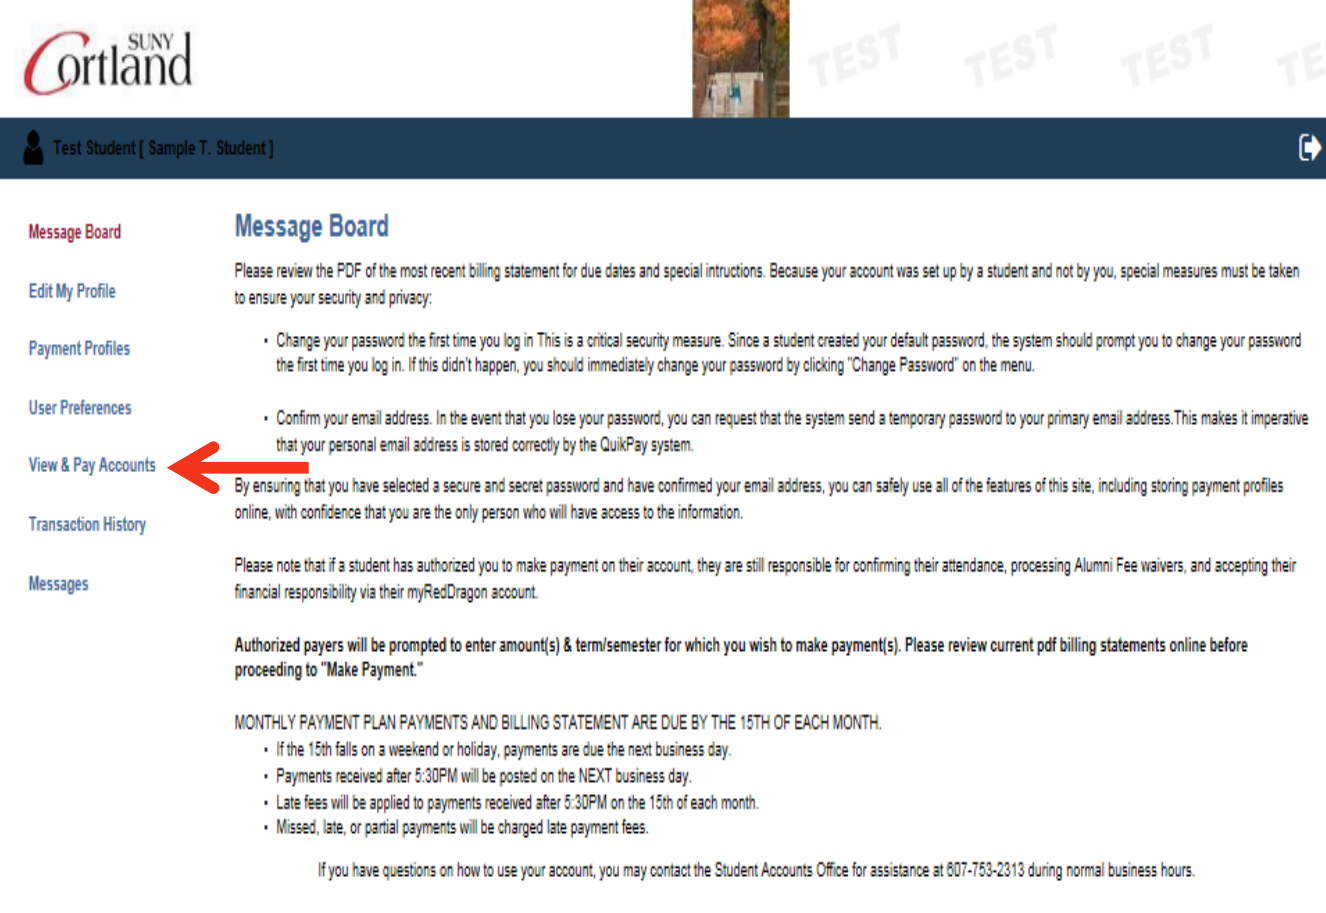
10. You will now be placed in QuikPay. From the menu on the left, select "View & Pay Accounts."

Select make payment pic

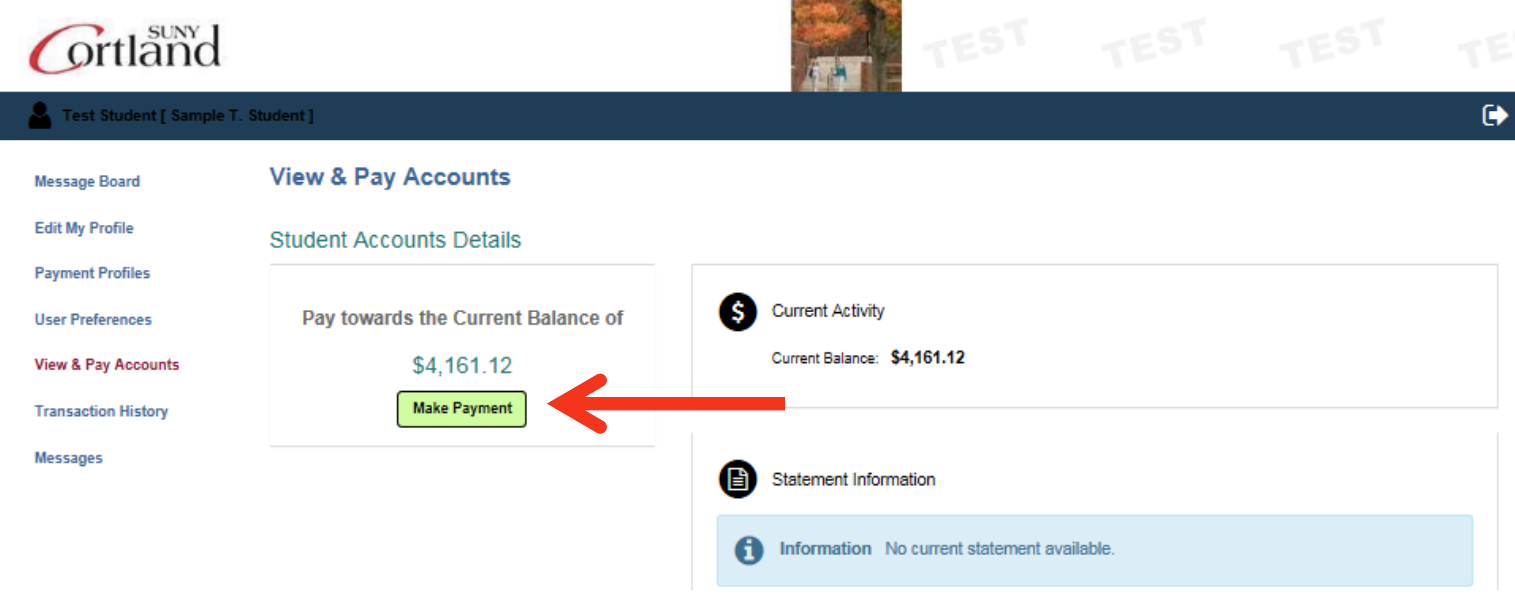
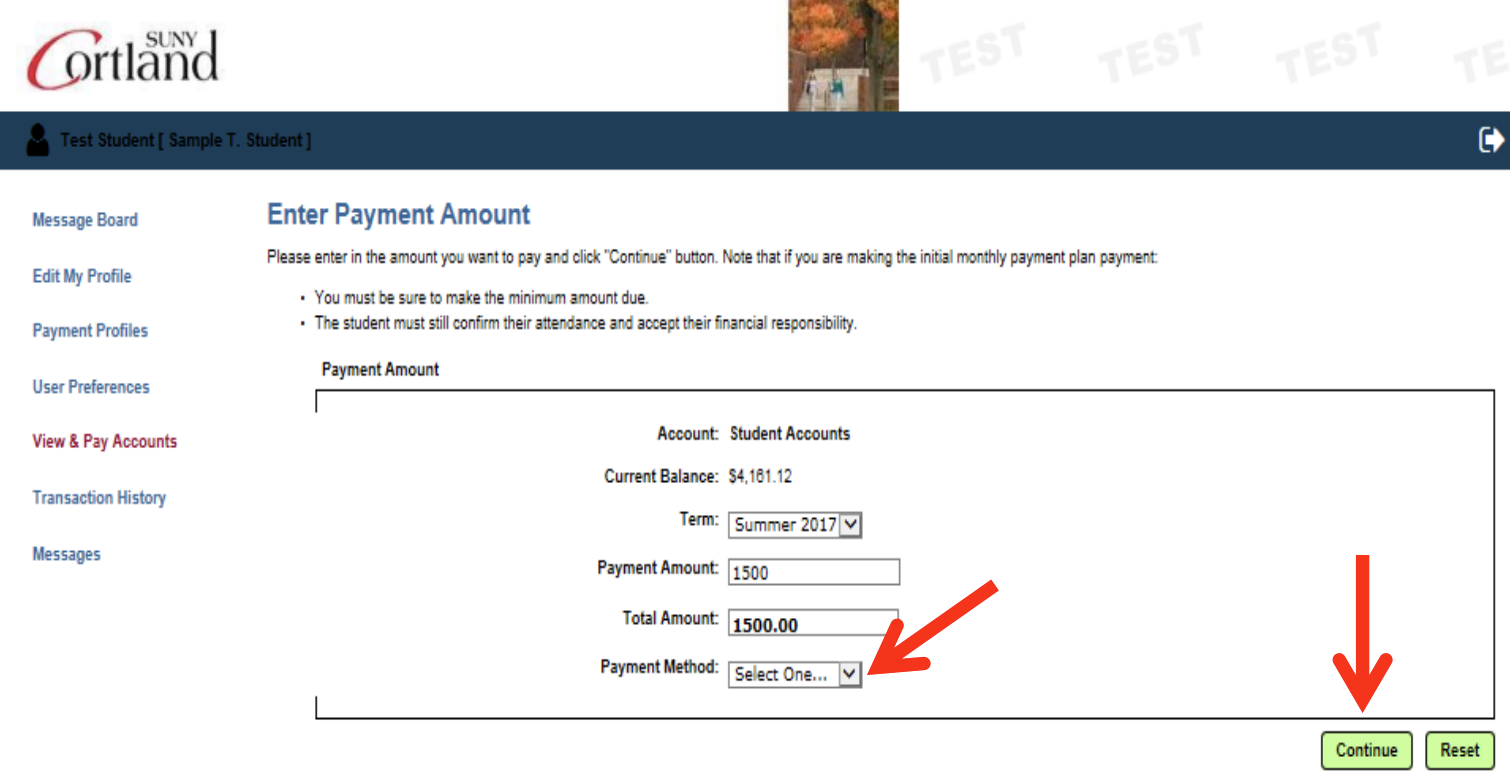
11. Select the "Make a Payment" button, choose your payment method (credit card, e-check or a previously saved profile) and select "Continue"

Screenshot of the Message Board page with an arrow pointing to the "Make a Payment" button

Screenshot of the View & Pay Accounts page, with arrows pointing to a dropdown to select a Payment Method and a Continue button

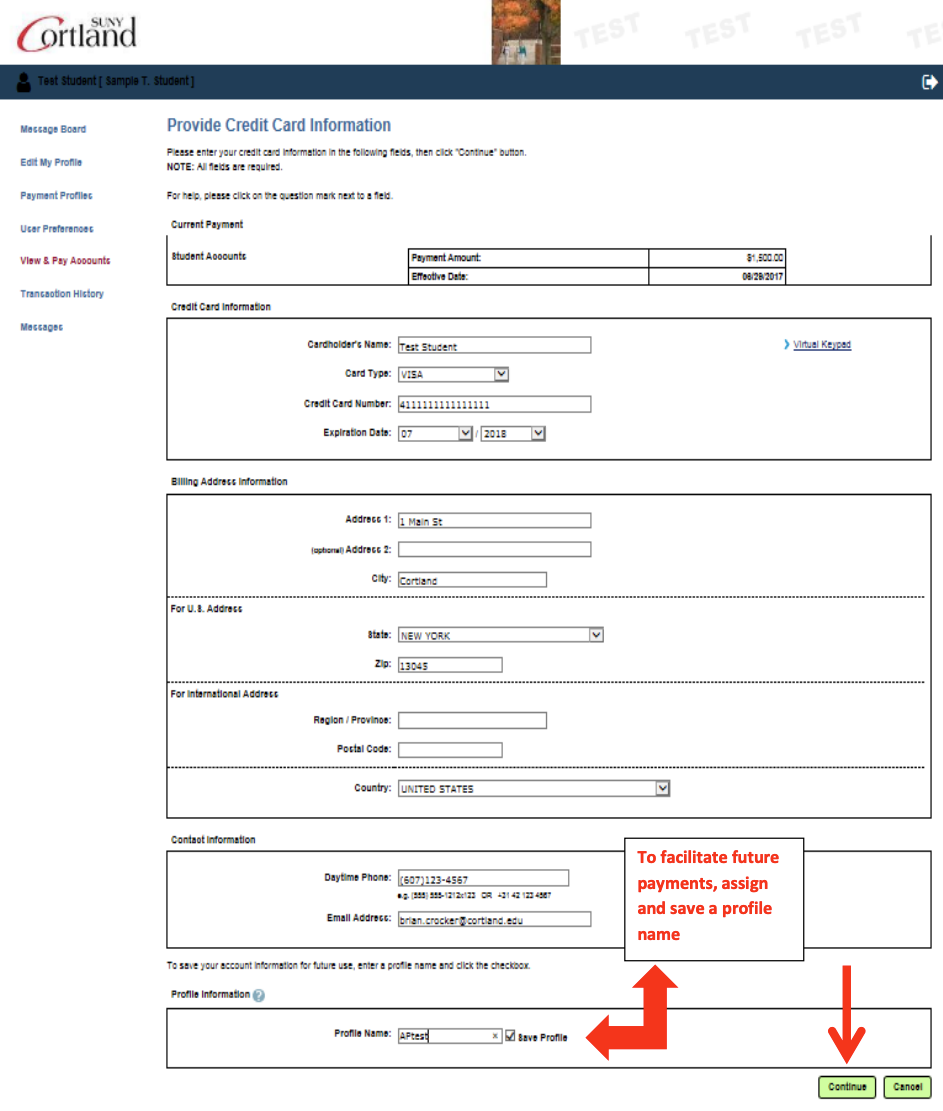
12. Fill in all required data and select “Continue.” To facilitate future payments, assign and save a profile name. This will allow you to pay the bill without re-entering all the required fields again.

Screenshot of portal with Credit Card information fields and arrows pointing to an option to save the credit card information with a profile name for use in future payments.

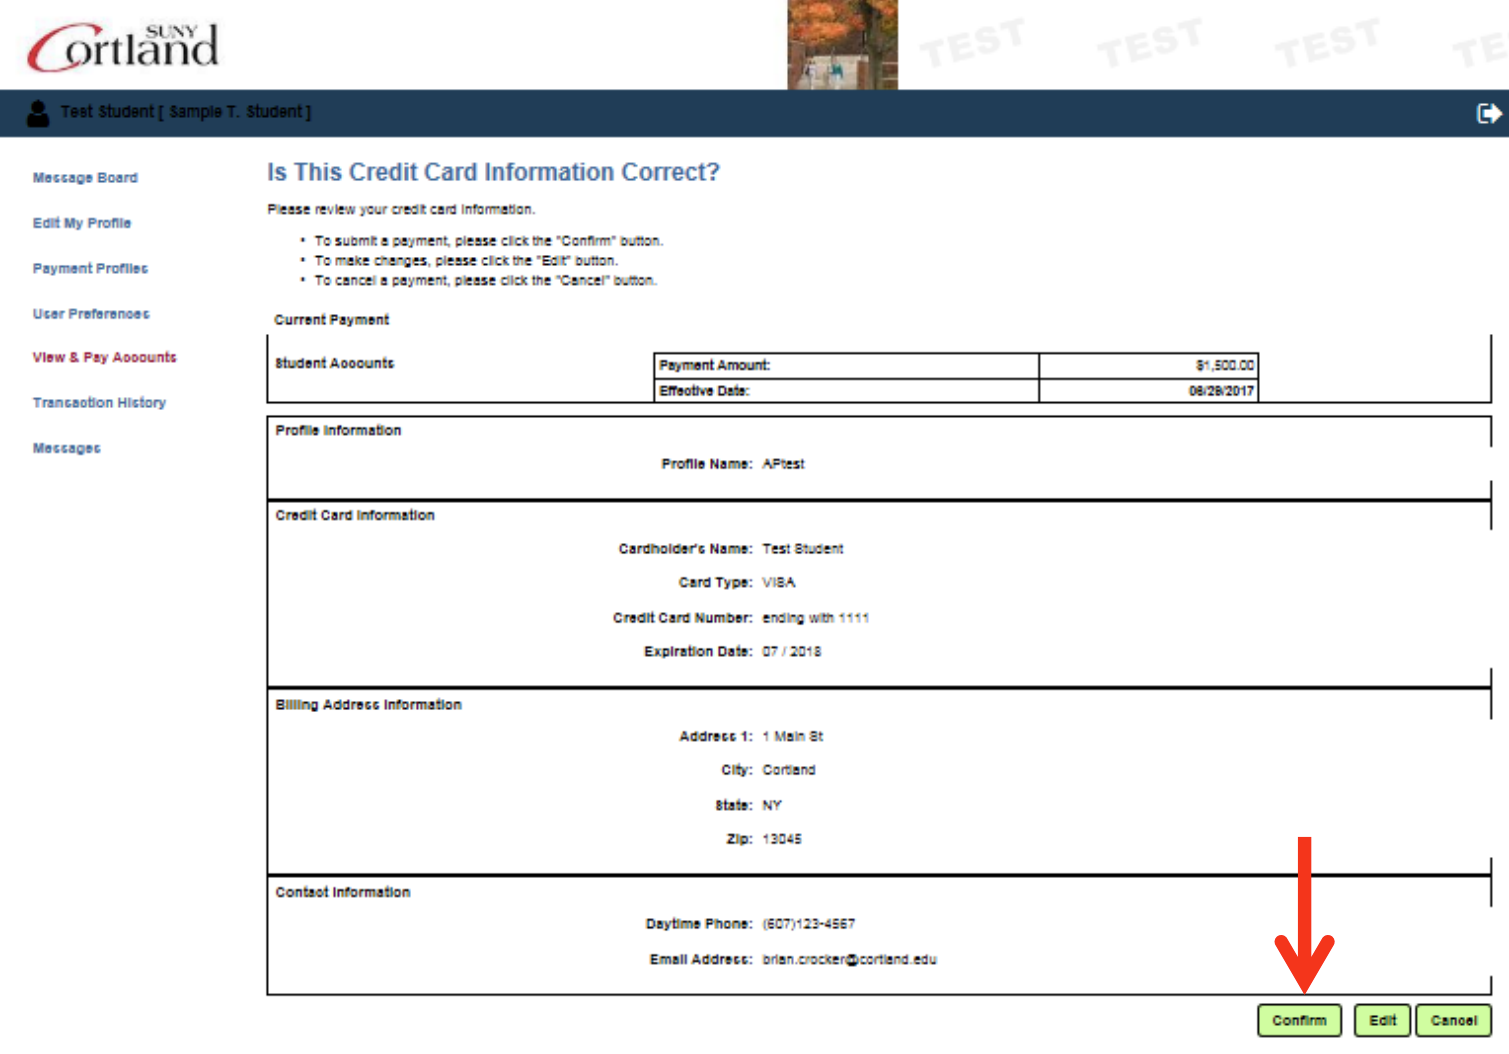
13. Review the information you provided and if it is accurate, select “Confirm.”

A screenshot of the portal requesting the payer to review that their information is correct and then select the "Confirm button

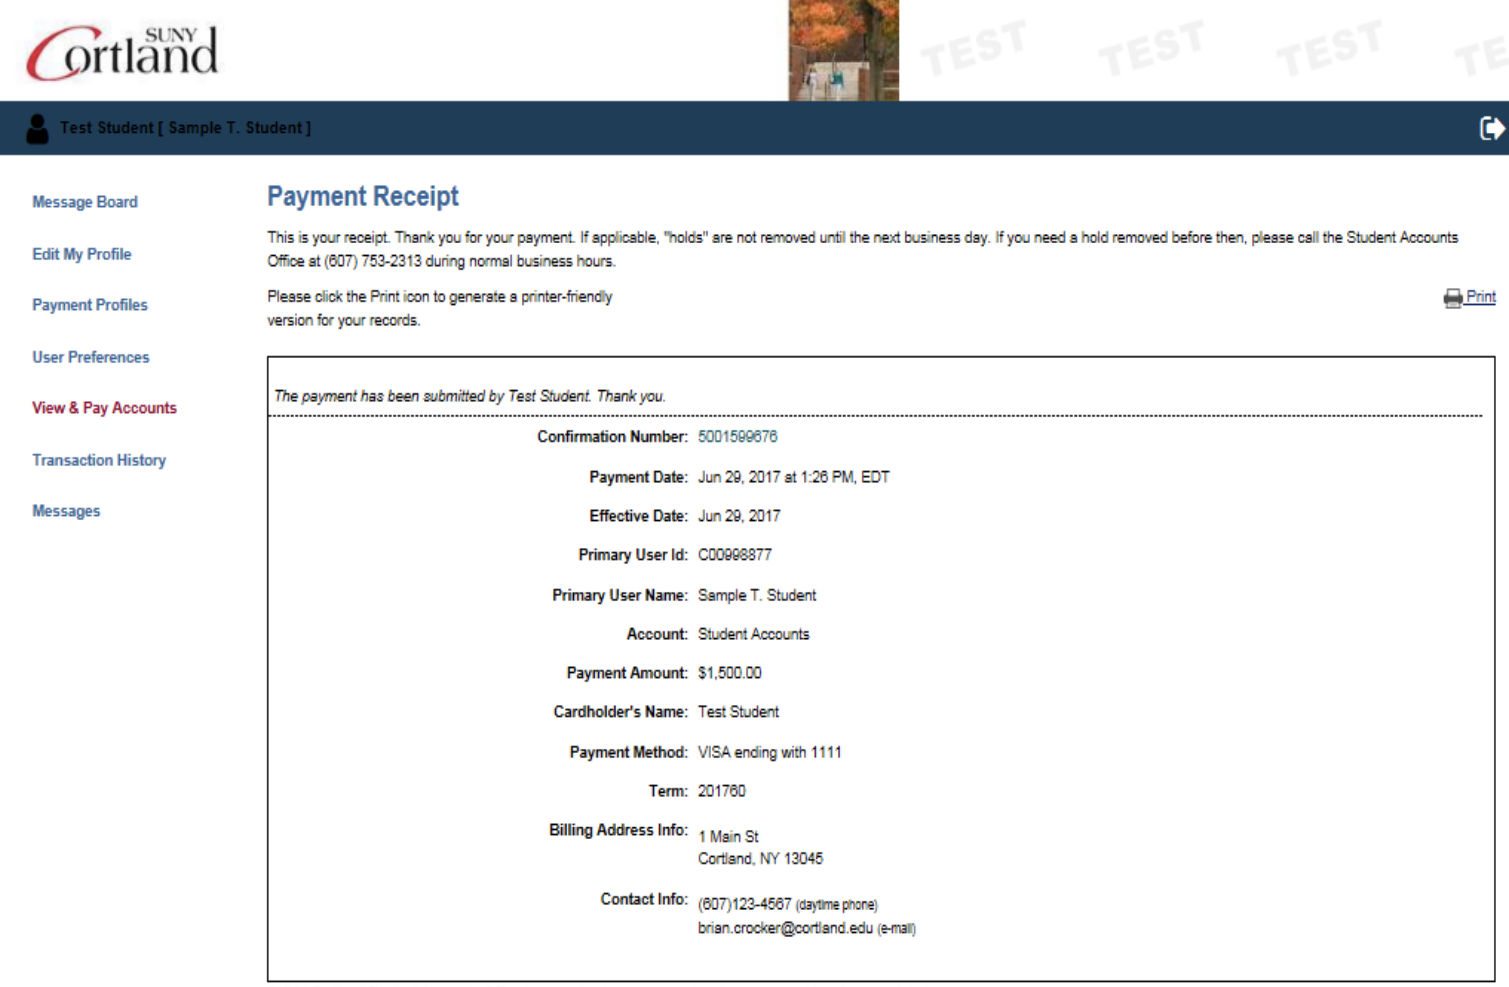
14. You will receive confirmation of your payment and you will also receive an email confirming your payment. We suggest you print a copy for your records.

Screenshot of Payment Receipt screen with overview of payment details and an option to print the receipt.