Add an Authorized Payer

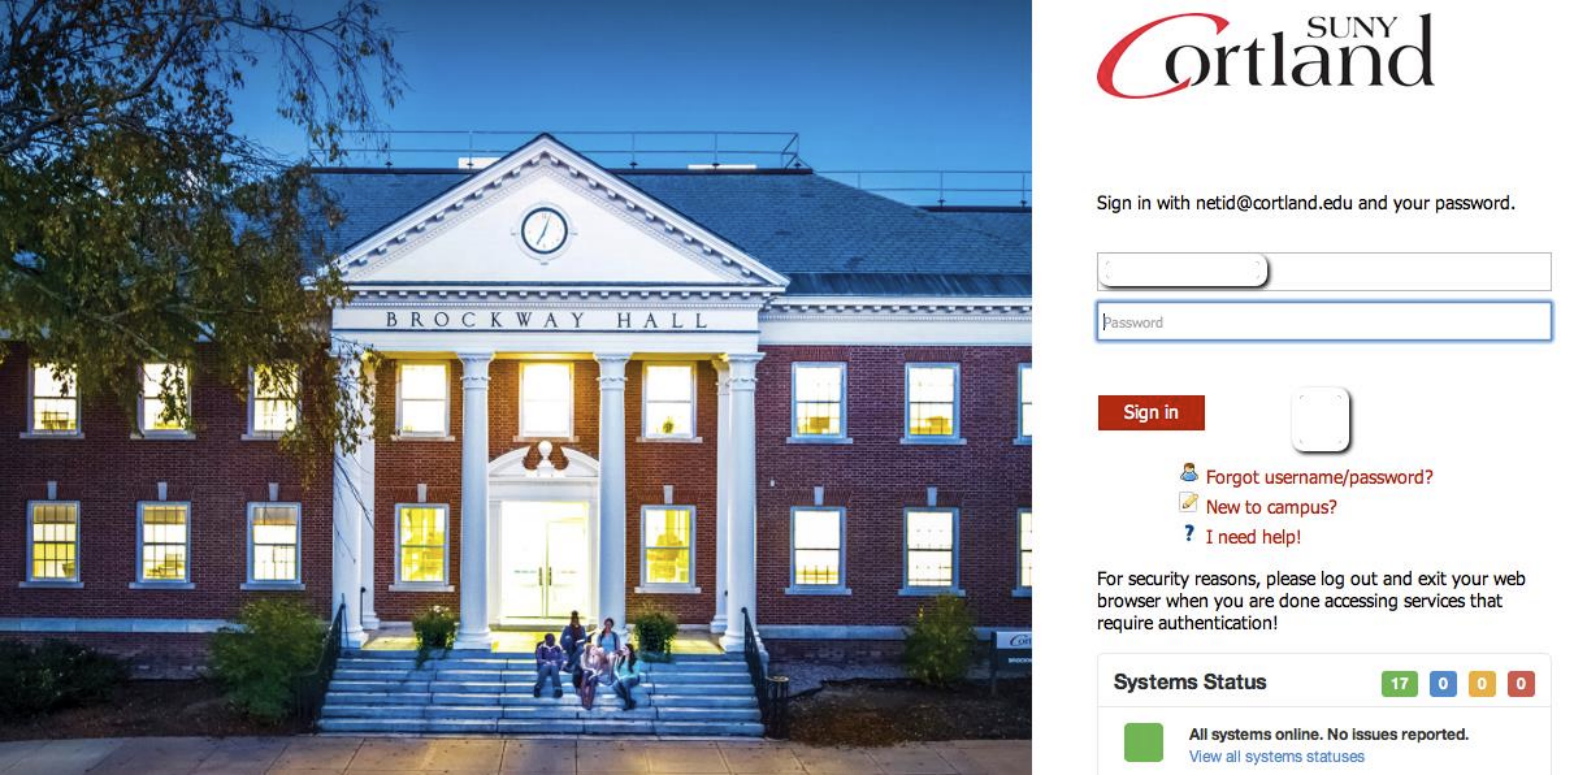
1. Sign in to your (the student’s) myRedDragon account. For assistance with signing in, select one of the help links. new-login-screen
2. Select the Student tab. Your homepage may look slightly different.
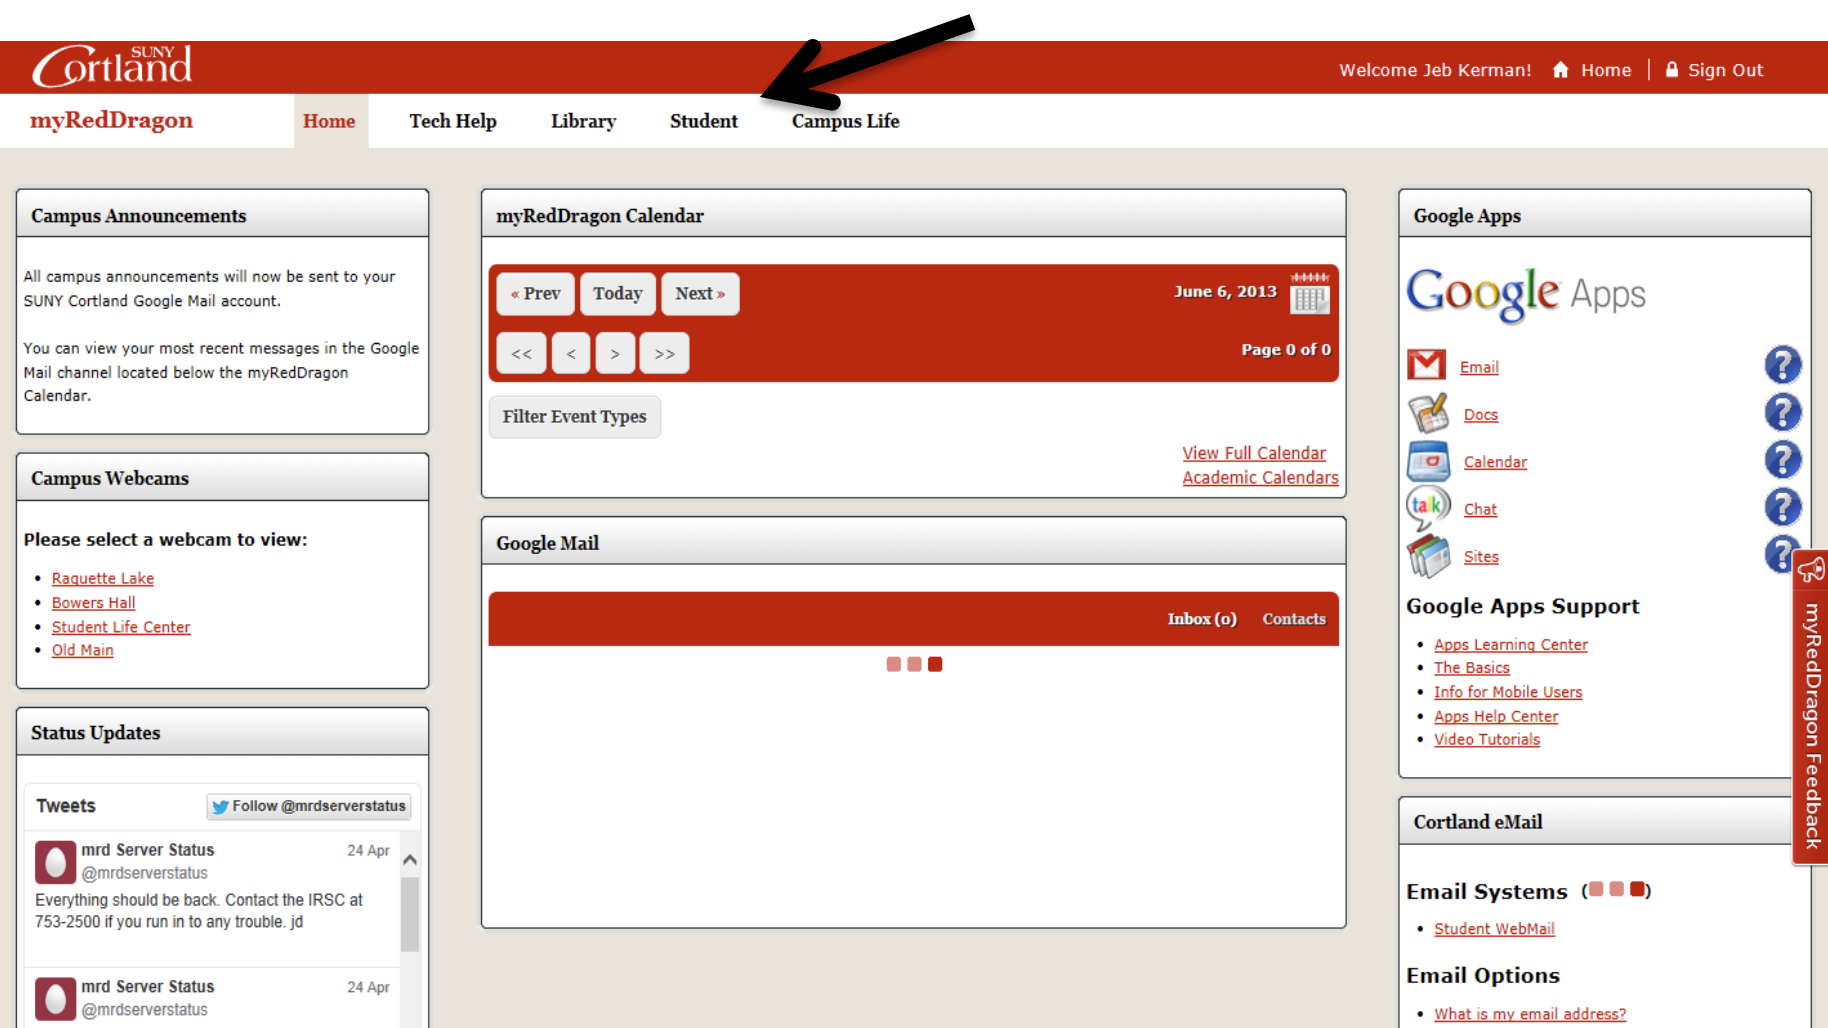
Guide-to-student-tab-via-home-page

3. From the Student Accounts channel, select “My Online Account or “Set up 3rd Party payment Authorization.” 
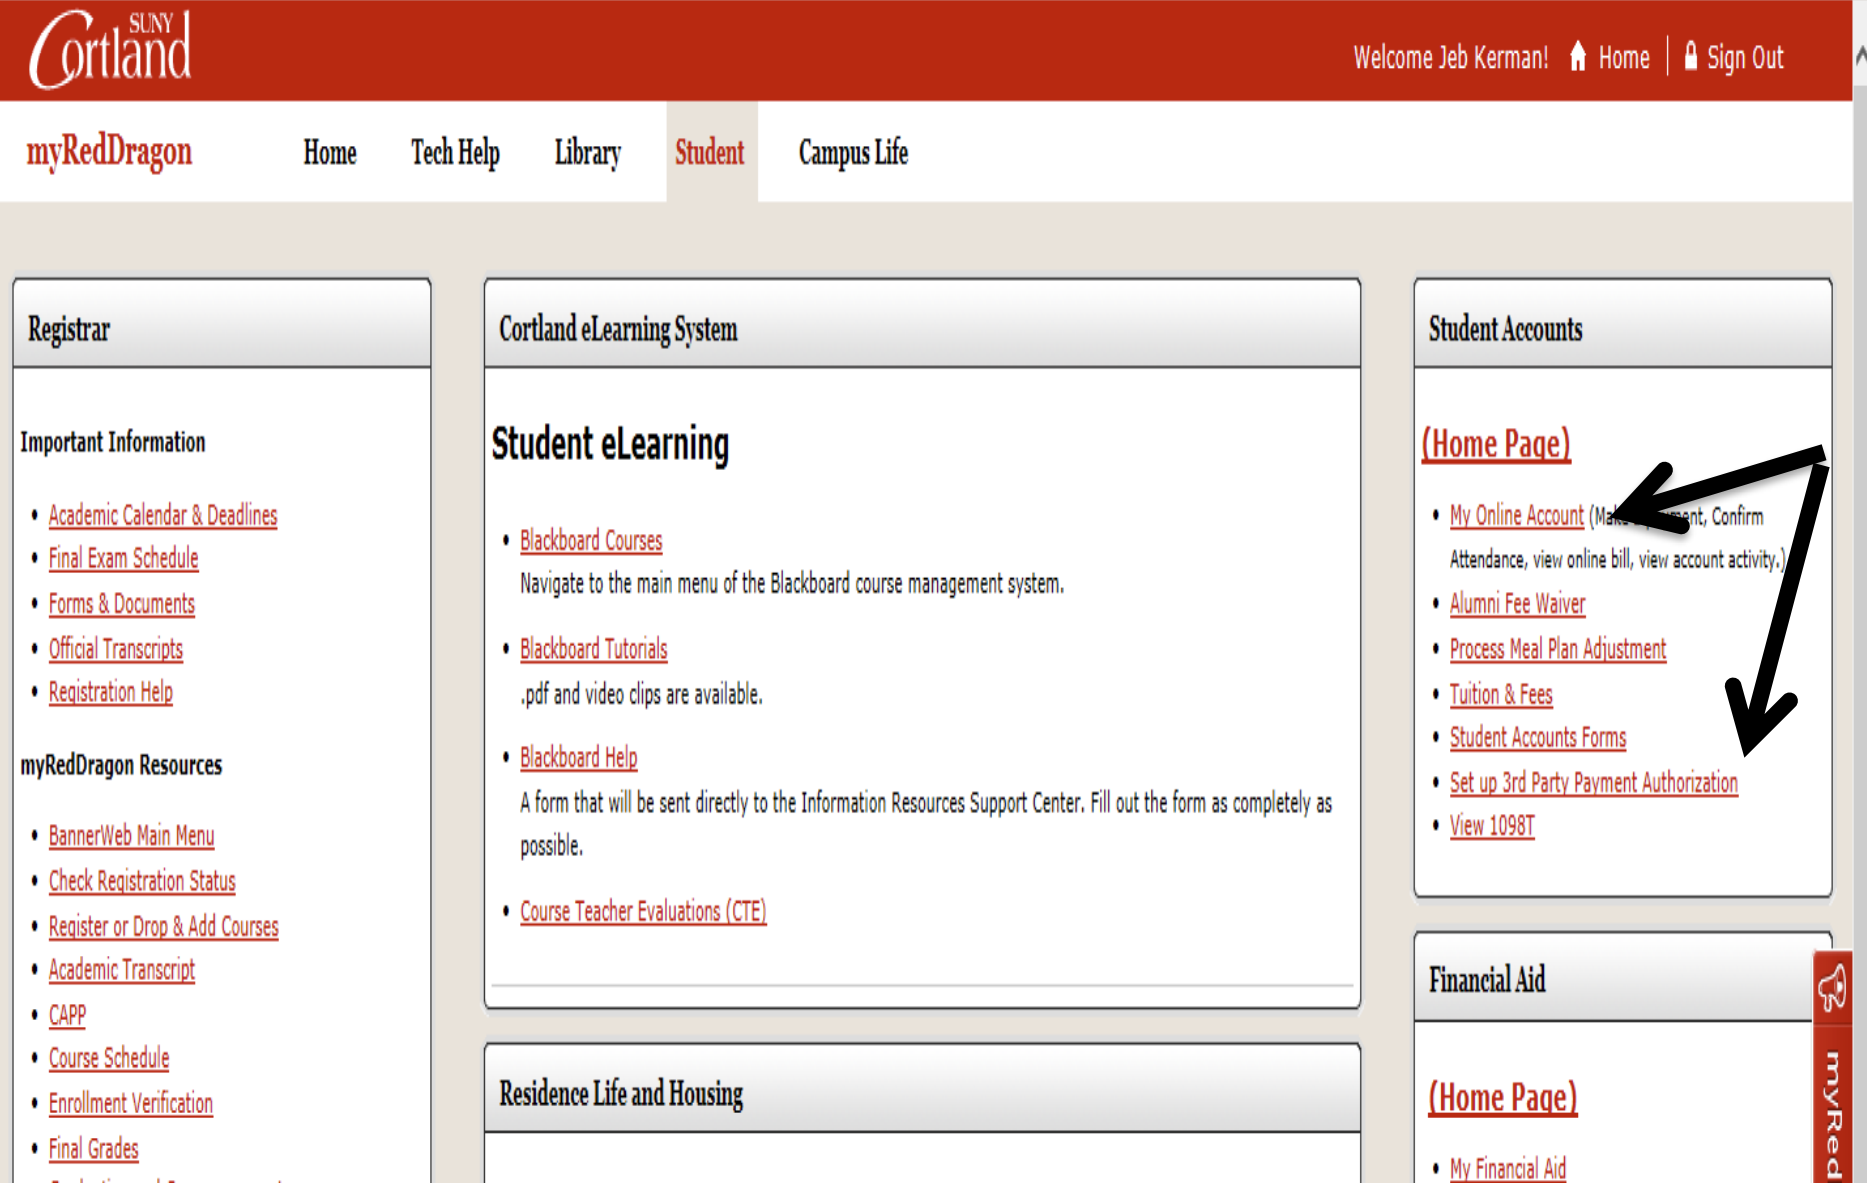
Online-account-and-add-3rd-party

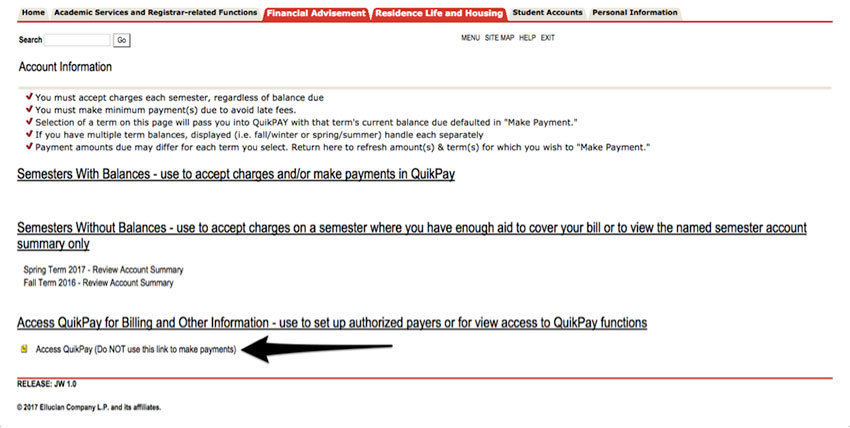
4. Select “Access QuikPay.”

Billing Options

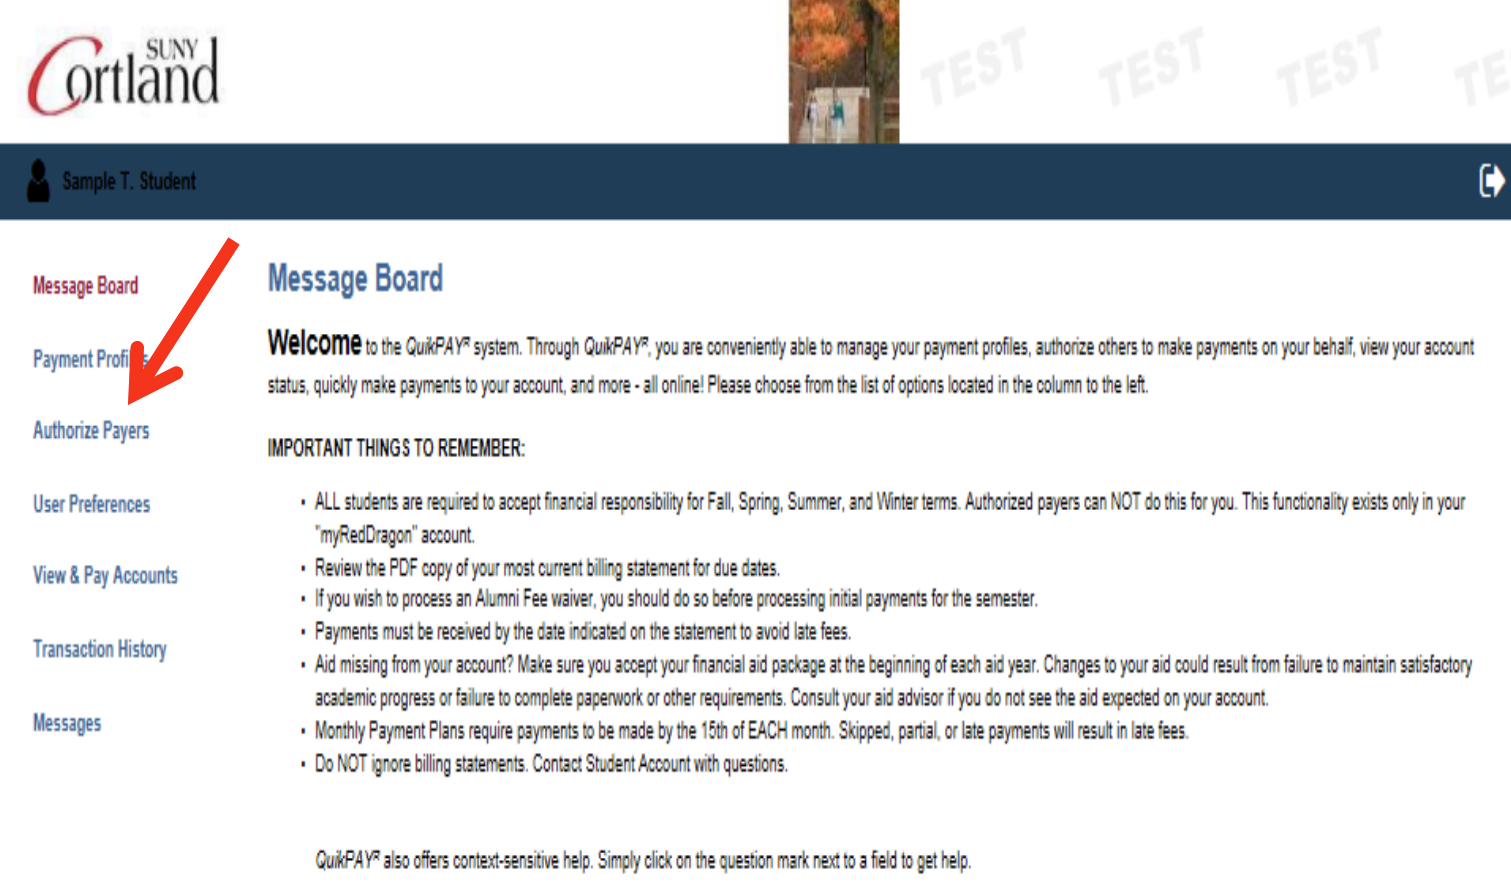
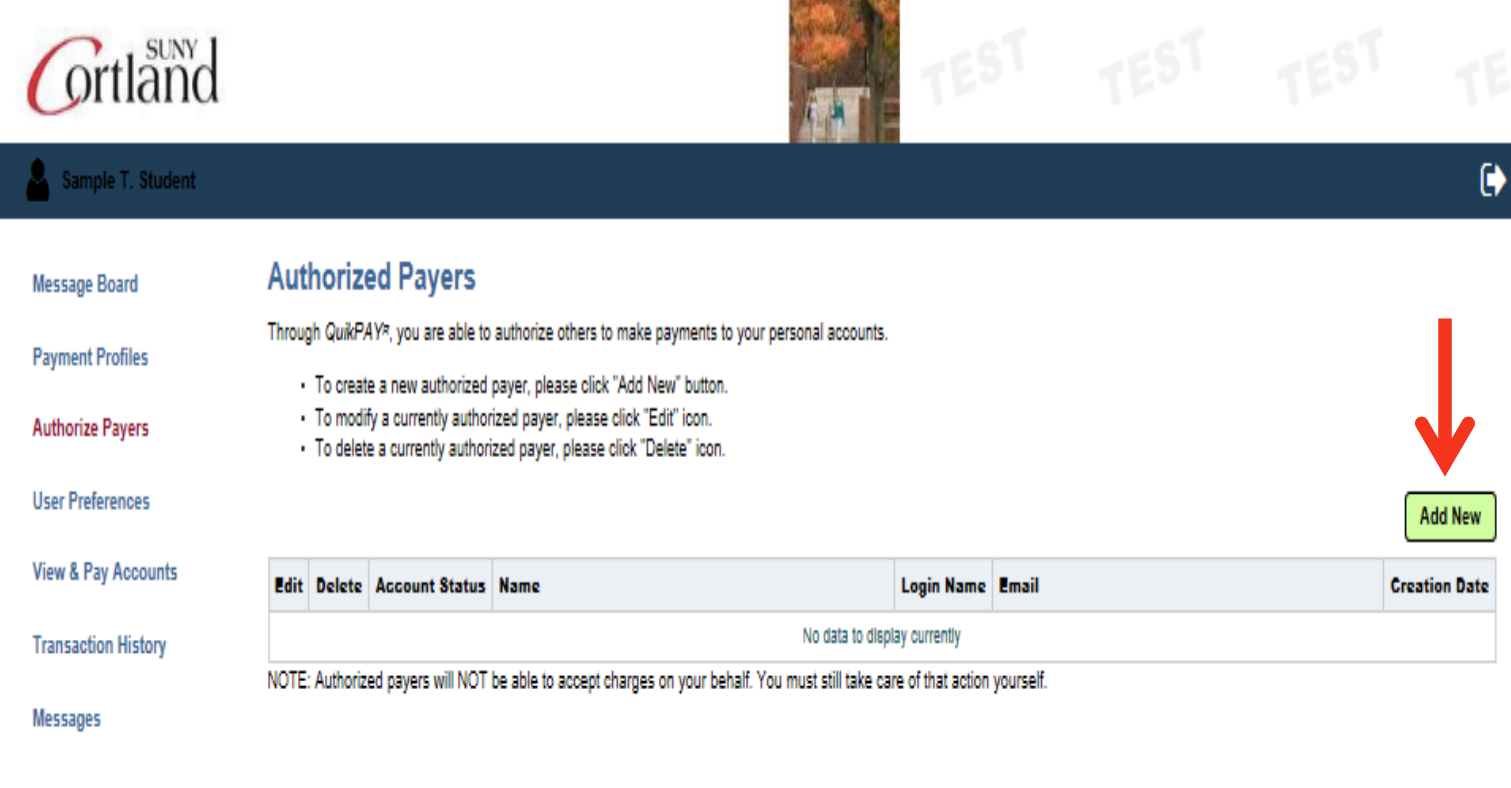
5. Select “Authorize Payers,”  then add new

Authorized Payers Page

7. Provide required data and select “Add.” 
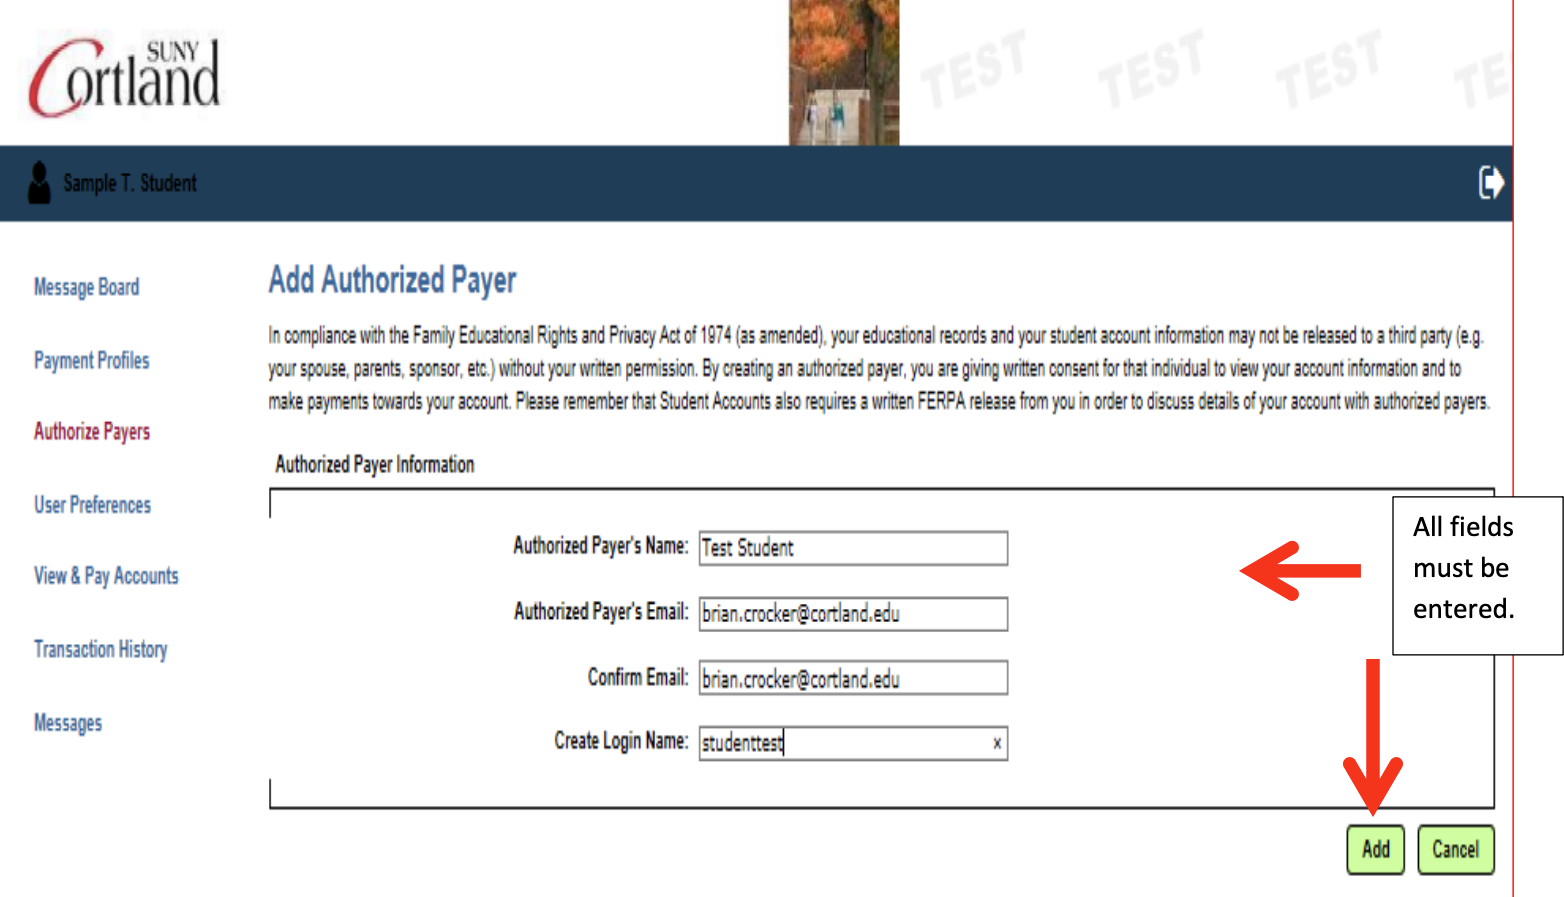
Screenshot of the Add Authorized Payer screen with a note reading "All fields must be entered" and arrows pointing to the required fields and the "Add" button

8.  You will receive a confirmation that the authorized payer has been successfully added.
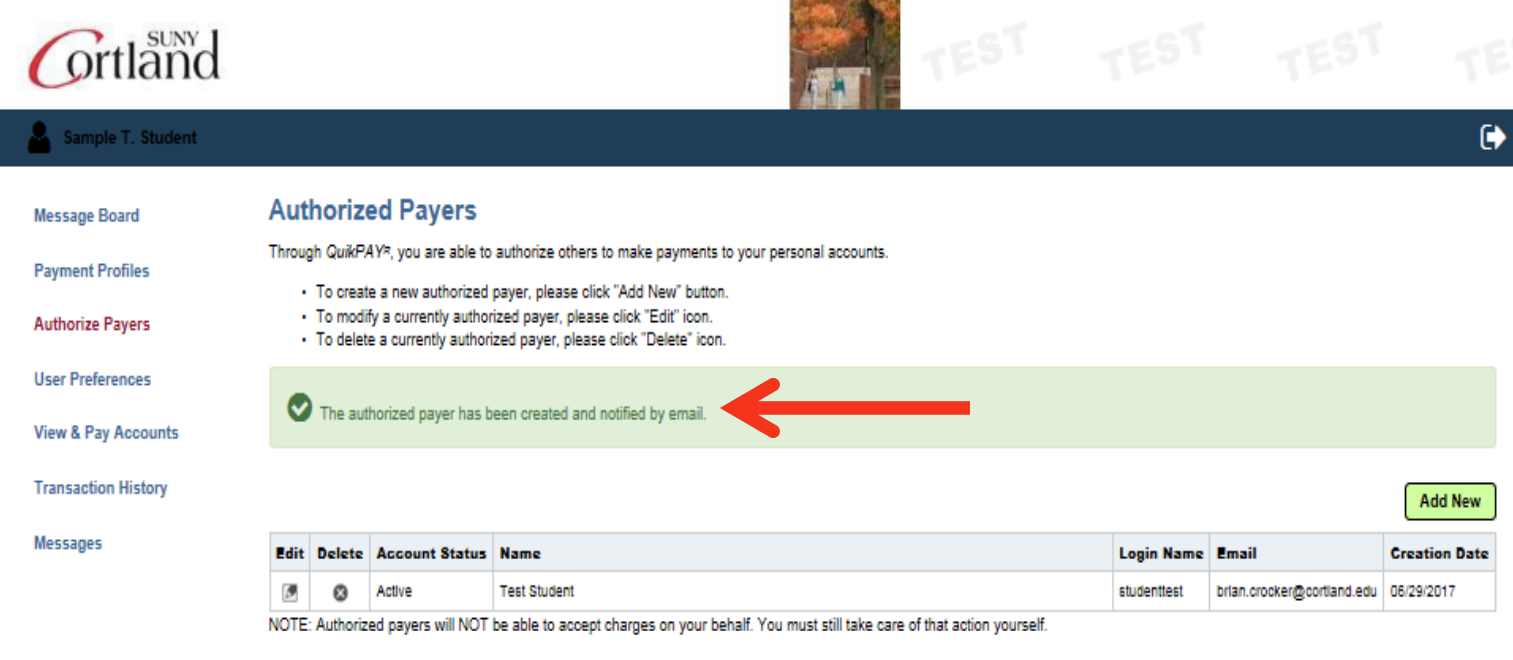
Screenshot of Authorized Payers page with an arrow pointing to the success message: "The authorized payer has been created and notified by email"

9. The authorized payer will receive an email from [email protected]
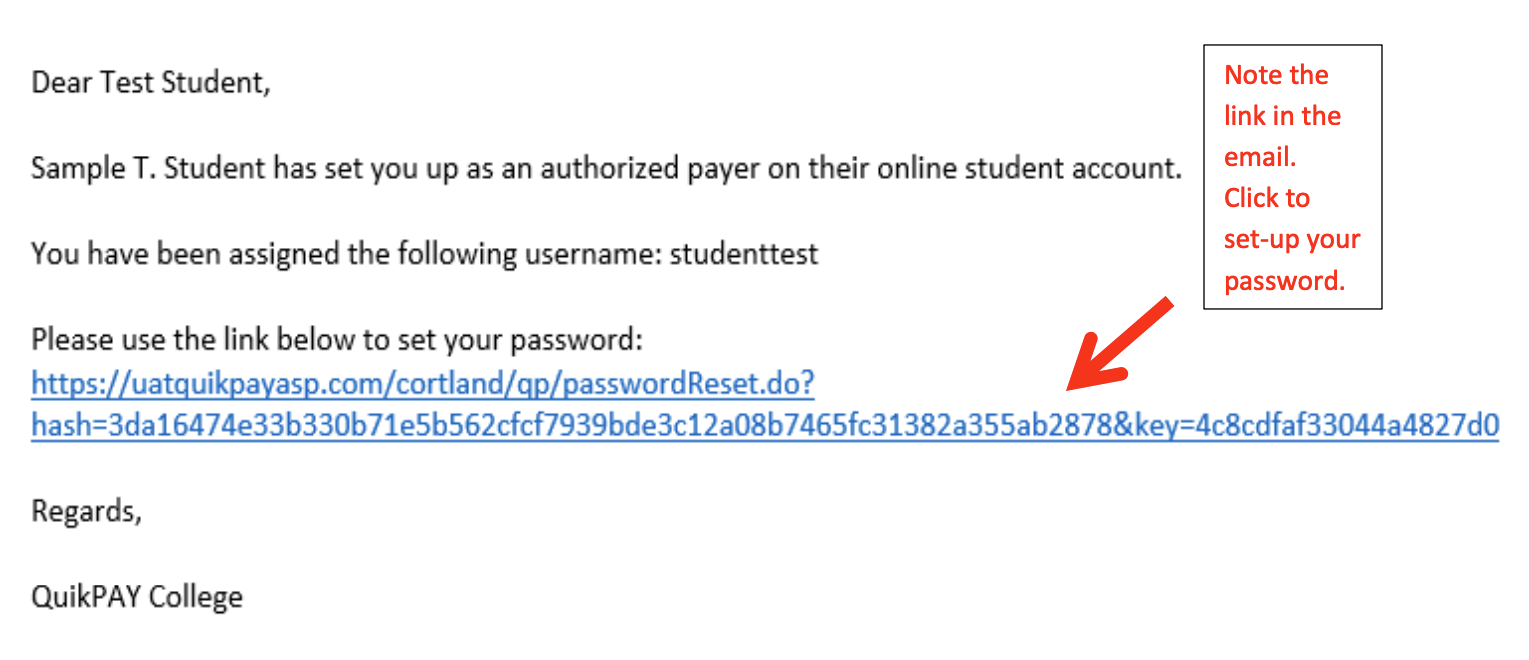
Screenshot of the email that the authorized payer receives. The email includes the student name, the authorized payer username and a link for the authorized payer to set a password. The screenshot has a note reading "Note the link in the email. Select the link to set up your password."

10. You will need to select your password and confirm.
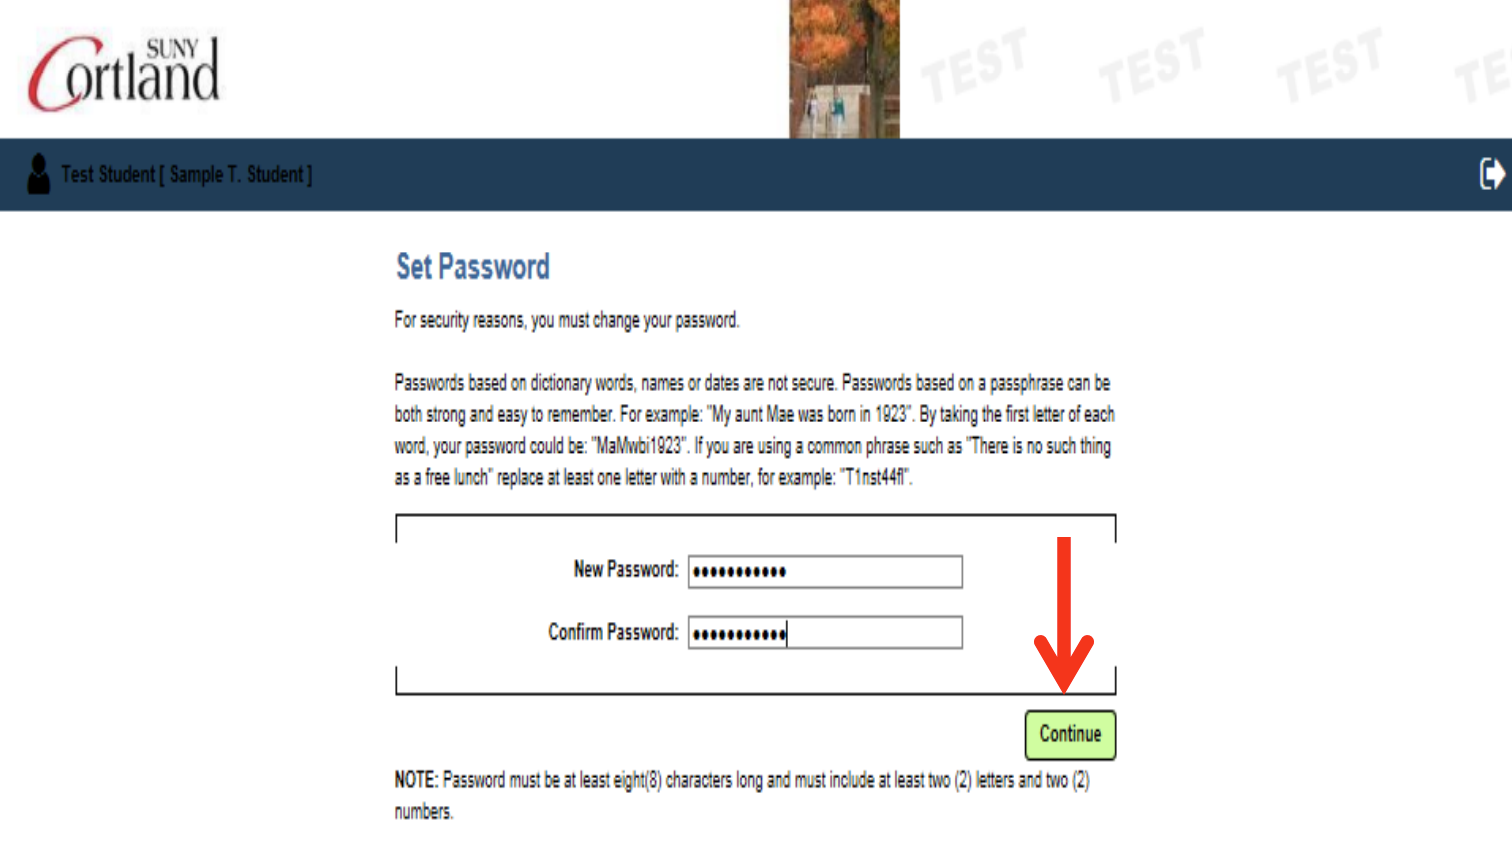
Screenshot of page for authorized payer to Set Password. There is an arrow pointing to the "Continue" button

11. You will see the following screen after successfully selecting a password. 
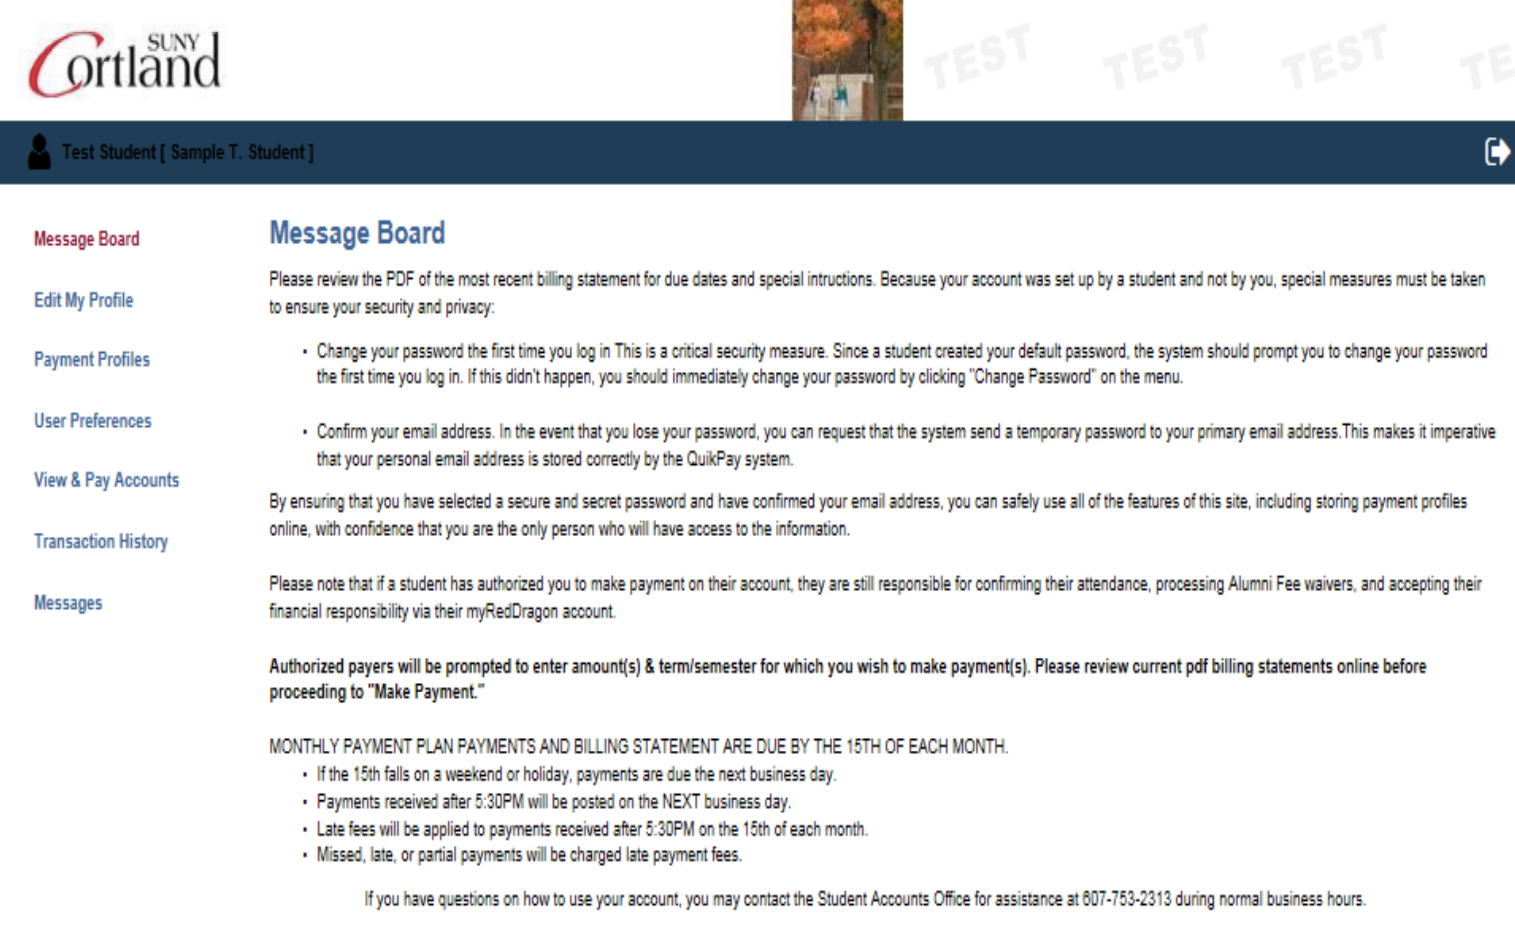
Screenshot of the Message Board page