How to enable ‘BitLocker To Go’ (for Windows) to secure USB flash drives
With the increase in the use of small, large capacity USB drives, the potential for sensitive data to be lost
or stolen has become a serious threat. How can you protect SUNY Cortland data from loss, theft, or cyber criminals while using a USB flash drive? The answer: *BitLocker.
To enable BitLocker encryption on a USB flash drive, do the following:
- Insert the USB flash drive into the computer, click Start, and then click Computer.
- Select the USB flash drive. Once selected, right-click the USB flash drive, and then click Turn On BitLocker…
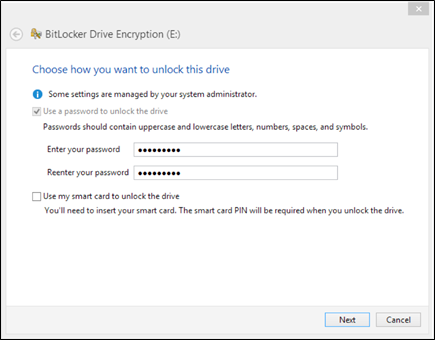
- On the Choose How You Want To Unlock This Drive windows, choose Use a Password to Unlock This Drive. Once a password is entered, choose Next.
- This option prompts the user for a password to unlock the drive. Passwords allow a drive to be unlocked in any location and to be shared with other people.
- The password should contain a mixture of letters, numbers, and special symbols.
- On the How Do You Want To Store Your Recovery Key window, click Save The Recovery Key To A File.
- In the Save BitLocker Recovery Key As dialog box, choose a save location, such as your SUNY Cortland U drive folder then click Save.
- You can also print the recovery key if you desire. With this recovery key file you can regain access to your encrypted USB flash drive in the event you forget your password.
- SUNY Cortland warns against printing recovery key information. However, if a user chooses to do so, SUNY Cortland warns to not store a printed copy of the Recovery Key with the USB flash drive in the same location. For example, if both the USB flash drive and recovery key are in the same bag during travel it would be very easy for access to be gained to the USB flash drive by an authorized user.
- On the Are You Ready To Encrypt This Drive window, click Start Encrypting. Do not remove the USB flash drive until the encryption process is complete. How long the encryption takes depends on the size of the drive. USB drive encryption take approximately 6 to 10 minutes per gigabyte to complete. The encryption process performs the following:
- Adds an autorun.inf file, the BitLocker To Go reader, and a ReadMe.txt file to the USB flash drive.
- Creates a virtual volume with the full contents for the drive in the remaining drive space.
- Encrypts the virtual volume with Advanced Encryption Standard (AES) 128-bit.
- Once the encryption process completes you will be notified by a window.

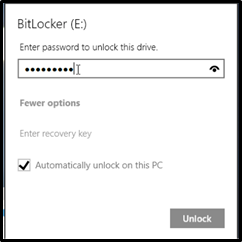
- When you insert the encrypted drive into a USB port on a computer running Windows 7 and above dialog box will display. When you are prompted, enter the password you created. Optionally, check Automatically Unlock On This Computer From Now On for ease of use. If you are running Windows 8 you must click on More options to check Automatically unlock on this PC.
- Finally, click Unlock.
*On the Windows side, only Pro and Enterprise editions of Windows have BitLocker. Encrypting a drive can only happen on these versions.
However, you can unlock encrypted removable drives on any version of Windows 7 through 10. BitLocker is not available in Windows XP or Vista, but you can use the BitLocker To Go Reader to view content on BitLocker-protected removable drives from a computer running Windows XP and Vista.
https://www.microsoft.com/en-us/download/details.aspx?id=24303
How to enable FileVault (for Macs) to secure USB flash drives
With the increase in the use of small, large capacity USB drives, the potential for sensitive data to be lost or stolen has become a serious threat. How can you protect SUNY Cortland data from loss, theft, or cyber criminals while using a USB flash drive? The answer: FileVault. To enable FileVault encryption on a USB flash drive, do the following:
- Insert a BLANK USB device into the Mac.
- This process WILL erase all content on a USB, please make sure all files are moved off the USB before encrypting it, or there is not data on the USB.
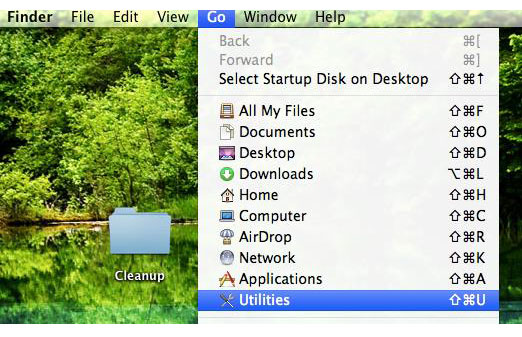
- On the desktop select Go. Scroll down to Utilities, then select Disk Utility.
- This might be easiest to find while viewing in List format.
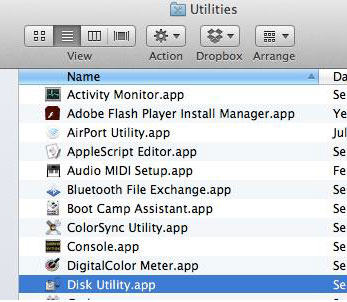
- This might be easiest to find while viewing in List format.
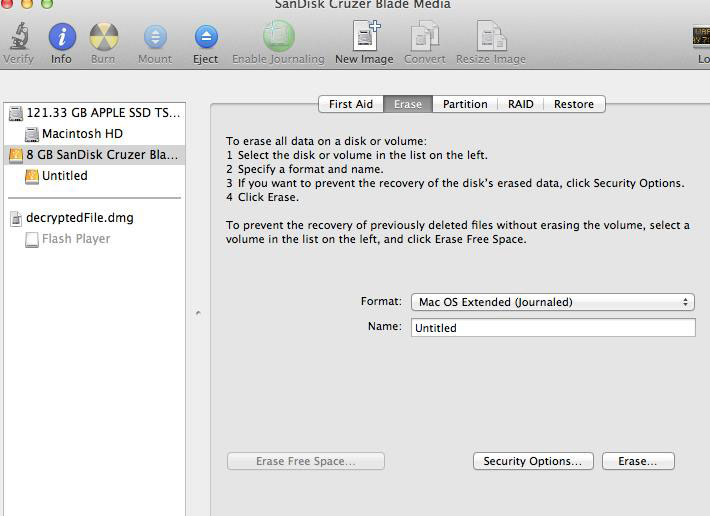
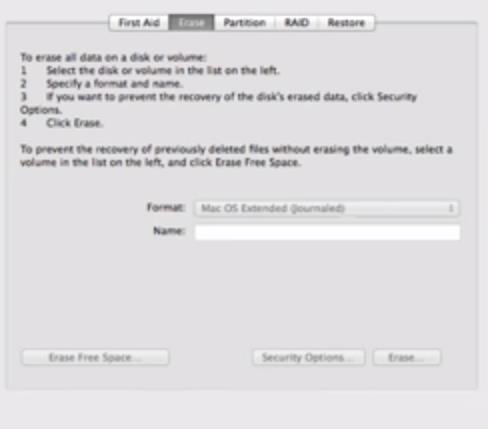
- On the right side, select the USB drive and then on the Erase tab.
- The difference between Mac OS Extended (Journaled, Encrypted) and Mac OS Extended (Case-sensitive, Journaled, Encrypted) is that Mac OS Extended (Case-sensitive, Journaled, Encrypted) allows have files and folders to have the same name with different cases structures. Such as the example shows above, music and Music folder names.
Under Format dropdown, select MAC OS Extended (Journaled, Encrypted).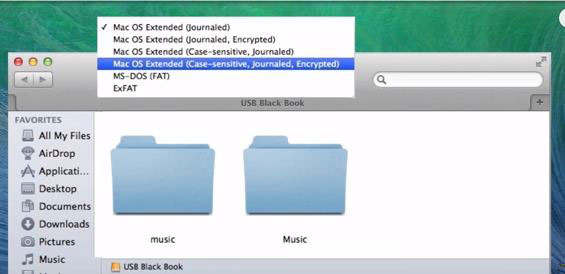
- The difference between Mac OS Extended (Journaled, Encrypted) and Mac OS Extended (Case-sensitive, Journaled, Encrypted) is that Mac OS Extended (Case-sensitive, Journaled, Encrypted) allows have files and folders to have the same name with different cases structures. Such as the example shows above, music and Music folder names.
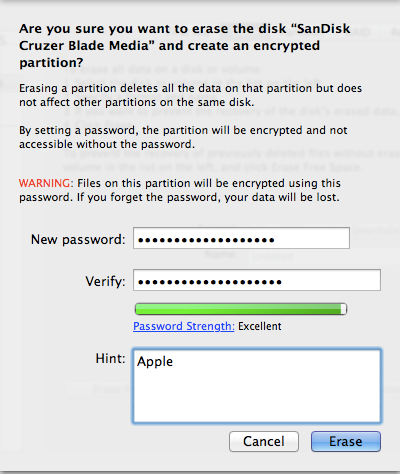
- Once MAC OS Extended (Journaled, Encrypted) is selected, select Erase.
- A pop-up message will appear to confirm that the drive should be encrypted. Enter in a password and hint, if you choose.
- Select Erase.
- Toward the bottom of the screen, a progress bar will appear.
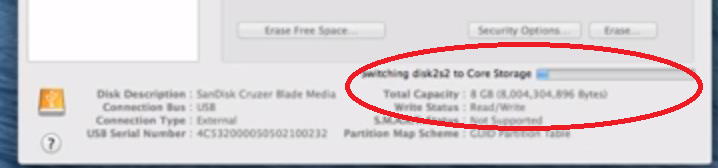
- When the encryption is complete, the formatting window will re-appear but grayed out.
- Once the USB drive is encrypted, data can be copied back on to the drive or just start usage.
- The USB drive can be safely ejected at this time.
- The USB drive can be safely ejected at this time.
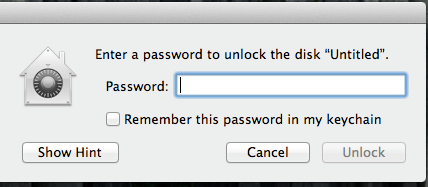
- The next time the USB drive is plugged into a MAC, it will prompt for a password to be entered.